Google+
Showing posts sorted by date for query Minnie Mouse. Sort by relevance Show all posts

Summer Craft Kits Product Reviews


 Disclosure: I was sent these craft lots to review free of charge from Oriental Trading. All opinions in this post are my own. I did not receive any other compensation for this review. I added links to the particular products for your convenience, but not for any compensation. 

Point I get them to for Hazel

Minnie Mouse Party Foods and Activities -- The Details


Since the my post the other day became so long with sharing our decorations, I thought today I would share the details of what we served and what the kids played. Let's start with the cake since every birthday party needs a cake. Our cake was the strawberry cake we have made for most of Hazel's parties. The original recipe is found at Confections of a Foodie Bride. I have made changes over the past couple of years. At some point I will have to actually write down my changes and post about them. We made an eight-inch round cake and three small round cakes. I bought these pans at Joann Fabrics with a coupon for the ears.  We bought a container of chocolate frosting since black frosting is hard to come by and has so many chemicals for colors. 

Minnie Mouse Party & Decoration Product Review


 Disclosure: I was sent the decorations to review free of charge from Oriental Trading. All opinions in this post are my own. I did not receive any other compensation for this review. I added links to the particular products for your convenience, but not for any compensation.


So yesterday was the Minnie Mouse Half Birthday Party. Hazel had a blast. Now we spent a lot of time getting ready for this party and have posted many DIY ideas already. We also received five items from Oriental Trading that we used for the party. A few weeks ago we shared our Minnie Pinata and the black streamers we used to make it.

Sharing Saturday 14-23

Have you entered my current giveaway yet?

Sharing Saturday Button

Thank you to everyone who shared with us last week! Once again I was blown away with the ideas! If you have not had a chance to check them all out, please do. We will start our features tonight with the most clicked from View from the Fridge: Think Outside the Toy Box: Glow Stick Ideas for Kids.

http://viewfromthefridge.com/outside-toy-box-glow-sticks/

My features this week are in two categories. The first is June/Summer and holidays (remember in the US Father's Day is next weekend!!), and the second is just a few of my favorites from last week.

Summer and June Features

1) From Mamas Blog Central: 50 Father's Day Ideas
2) From  Just a Touch of Crazy: His Little Girl, Father's Day Print
4) From Tot Schooling: Free Birthday Printable Pack 

A Few of My Favorites

1) From Sparkling Buds: Watermelon Printing
2) From Dabbling Mama: Princess Rocks 
3) From Excite and Explore: DIY Farm Play Mat 
4) From Planet Smarty Pants: The Magic of Chocolate 
5) From Teaching Every Day: Ten Ways to Learn with Water Beads 
Thank you to everyone who shared last week!! I hope you will join us and share again!! If you are featured here, please feel free to grab a featured button to display proudly on your blog. 

Photobucket


Featured Button Code:


From Your Hostess:
This week we shared many DIY ideas for our Minnie Mouse party which is tomorrow. Here is a preview of the cake we made today. I tried to burn one candle half way since we are celebrating her half birthday.

 Ok, for Minnie DIY ideas we shared Easy Minnie & Mickey Mouse Cake Plates, DIY Pin a Bow on Minnie Game, DIY Minnie Mouse Decorations, and our Minnie Mouse Party Menu! We also shared this week Angkat: A Cambodian Cinderella and our review of The Air Plant Shop and we are hosting a giveaway for $30 gift certificate from this wonderful shop!!


Make sure you enter our giveaway for the $30 gift certificate to the Air Plant Shop!! They have such neat things and  fun easy craft ideas!
Our Air Plant Craft

Now for This Week's Party  
A Few Simple Guidelines:
1)  Please follow Crafty Moms Share via GFC (or one of the other ways that work for you).  

2)  Link any kid-friendly, child-centered post. Please no etsy shops or giveaways, etc.  Remember to link to your actual post. 

3) Post the Sharing Saturday button on your sidebar or somewhere on your blog to help spread the word.
Photobucket


4) I would love it if you would follow me on FacebookGoogle+, and Pinterest 

5) If you do not have a blog, but want to share an idea you can leave it in the comments or e-mail it to me with a picture (if possible).

 
 Disclaimer: By sharing here, you are giving Crafty Moms Share permission to use your photos for features and to pin your craft at Pinterest.

Minnie Mouse Birthday Party--DIY Decorations

For Hazel's half birthday party, I have some store bought Minnie Mouse decorations and some from Oriental Trading to review that Hazel picked out. However, I wanted to keep costs down and make some of our own. I have seen so many fun ideas online and have been pinning them to my Minnie Mouse Party Pinterest Board. I loved the idea of making Minnie head decorations from styrafoam balls. The first time I saw this was on The NY Melrose Family's Minnie Mouse Centerpieces. We did this. I glued them and Hazel painted them black. After the paint dried, I stuck a lollipop stick into each one.

Minnie Mouse Party Food

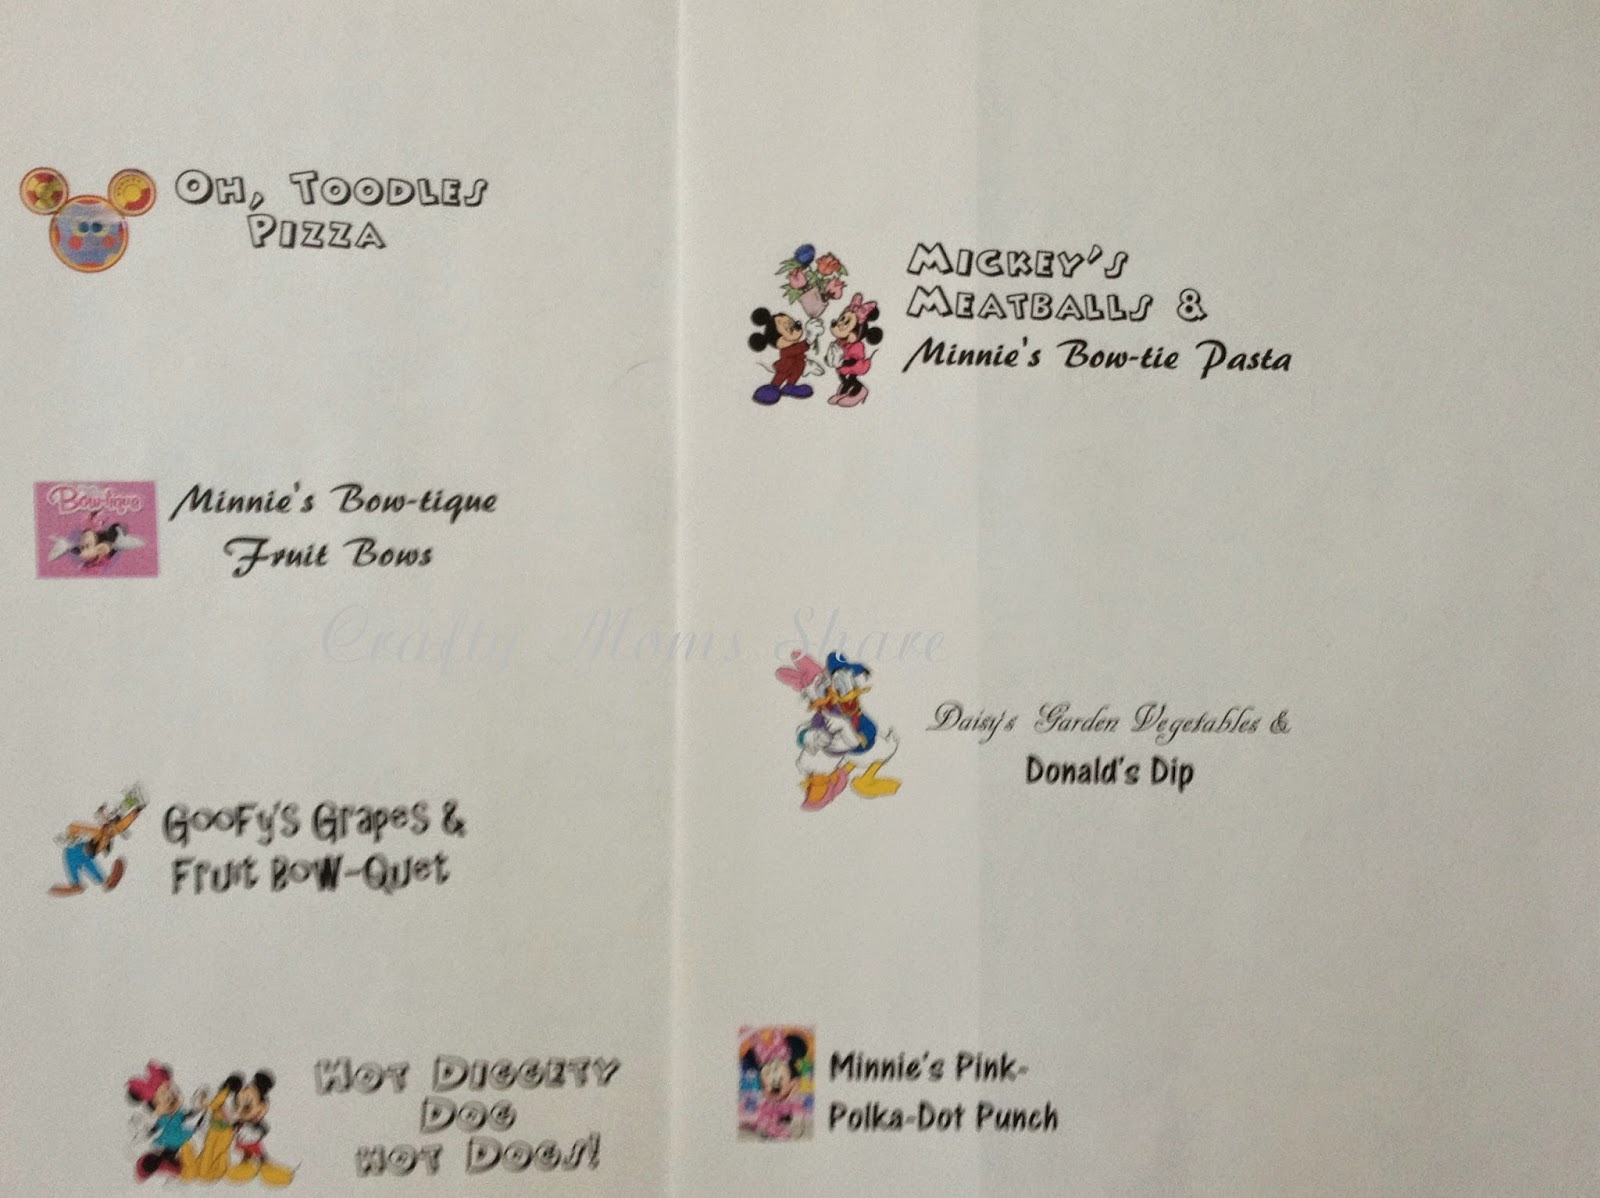
 So the party is this weekend and we finally figured out what to serve. Our menu includes:
  • Minnie's Bow-tique Pasta
  • Mickey's Meatballs
  • Hot Diggety Dog Hot Dogs
  • Oh, Toodles! Pizza
  • Daisy's Garden Vegetables and Donald's Dips
  • Goofy's Grapes and Fruit Bow-quet
  • Minnie's Bow-tique Fruit Bows
  • Minnie's Pink Polka-Dot Punch
  • And of course a Minnie Cake!

DIY Pin The Bow On Minnie Mouse Game


We have been working on final things for the Minnie Mouse party. It is this weekend! Today among other things, I made the Pin a Bow on Minnie Mouse game. Hazel really wants to play this one! To make it, I used a piece of black poster board, a white piece of paper and some polka-dot cardstock (I found it at Target). I used a large bowl and a small/medium bowl to make the head and a yellow-green colored pencil to show up on the black poster board. On the back of the poster board I traced the large circle bowl. Then I put the small bowl roughly where I wanted an ear and I had it overlap the large circle just a bit and traced it. Then I put it on the other side for the other ear. Once I got it how I liked it, I cut it out.

DIY Easy Minnie Mouse and Mickey Mouse Cake Plates & Free Food Label Printables

So when I bought all the Minnie Mouse stuff on clearance I did not get cake plates. I had pink cake plates we could use and Hazel was willing, however I kept seeing plates with ears on them as I researched for ideas. I realized how easy it would be to make them. I bought a pack of black cake plates at the Dollar Tree. Supplies to make the Mickey Mouse plates is just a pack of plates, black construction paper (two large sheets gave me enough ears for sixteen plates), a 3-inch circle punch and a glue stick.

I decided to use glue stick instead of craft glue so there would not be excess on the plates. To make Minnie Mouse plates you also need pink polka-dot paper (I found a pack of bright polka dot paper at Target--it was the only place I could find any) and scissors. I used the free jpg of bows at The Lovebugs Blog: Lovebug's Bow-tique Birthday Party.  Since I got them as a jpg, I was able to shrink the size for the plates. I am providing the new size of bows, but go check out her site for other great printables!! Here are the bows I used.


To make the plates, just punch two ears for each plate. I folded my large construction paper in half and did both sheets at a time so I got enough for two plates each time. Take two circles and put a little glue on one edge. Then glue to plate in appropriate places. Hold for a few seconds since it takes a bit of pressure to get the glue stick to stick. Let dry and do the next one. These will give you Mickey Mouse cake plates.


Mickey Mouse Cake Plate
(Sorry for the poor quality picture. My camera is acting funny!!) To make Minnie Mouse print out the bows using the template shared above on your bow paper and then put a small amount of glue stick on the back bottom edge of the bow and hold in place on the plate. You could also glue a ribbon bow on, but this would take longer and seeing how they are cake plates that will end up being messy and thrown away, I didn't think it was worth the expense or time.


I think they look cute and Hazel loves them! Since we are talking cake plates, I thought I would share our food labels with you as well. I will explain the food that goes with them in another post. I gave Hazel the choice of two types. I am providing you with both!  Just click picture for each type.


https://drive.google.com/file/d/0B8PVW7zBWFxscUd1UTc4T1JFejQ/edit?usp=sharing
Food Labels Using Characters and Clip Art Found On-Line


https://drive.google.com/file/d/0B8PVW7zBWFxsSHI4NUY0d3d3Yk0/edit?usp=sharing
Mickey & Minnie Mouse Food Labels
To make the Minnie Food Labels, I added bows again. I used the same template, but slightly larger. You can find them here.

So that is our newest installment of our Minnie Mouse Birthday Party series! For more posts check out:


Asian Kites


Hazel has been asking to fly a kite for awhile. Somehow whenever we are at my parents, it does not happen. They live near a beach and usually have more wind (and less trees and power lines) than us. Plus my father has some kites or at least he thinks he does. Well I bought her a cheap Disney Princesses kite and we are taking it to my parents' house this weekend. She is so excited. I told her by having her making paper kites in Asian styles with me first. I was really excited to find Asian Kites by Wayne Hosking at our local library.

All of the styles of kites we made came from this book. The book explains how to make real kites with Silkspan, however I was not looking to make kites to fly, but kites to show Hazel different styles from the Asian countries. We made them with paper and streamers. In fact we used leftover black streamers from Oriental Trading that we reviewed in our Minnie Mouse Pinata post. We also substituted drinking straws for the balsa wood to strengthen the kites. 

Source: Wikimedia Commons
The book has a bit of the history of the kite in the Introduction. Although many places say the first kite was flown in China, Asian Kites says it is actually unknown. It is believed that kites date back to two and a half to three thousand years ago. Kites also once carried messages based on their shapes, pictures or other cultural symbols. Eventually every day people began to fly them without a religious significance. There are many theories to how a kite came to be including leaves, trying to emulate birds, the wind blowing a farmer's hat and a tent or sail becoming airborne in the wind. Stories of Chinese kite flying spread through Europe thanks to Marco Polo. In the 15th and 16th centuries examples of kites were brought back from China and the East Indies. In the 18th and 19th centuries Europeans and Americans were using kites for scientific studies of natural elements including developing the flying machine. Asians were still flying kites to celebrate nature and human spirit. Many Asian cultures share their past with kite festivals as well as kite tours.

China gets to boast the first written record of a kite flying dating back to 196 B.C.E. The description tells how the Chinese general Han Hsin flew a kite to help calculate the distance his army would have to tunnel to escape. There are many legends of how the Chinese attempted to use kites in battle. The Chinese also used them for cultural and religious significances. With the invention of paper by Tsai Lun, kites became  a universal folk art and possible for all people to enjoy flying. From a Kite Day Festival to scaring away evil spirits at grave sites, the Chinese have a rich history of kite flying. Today China has six main kite regions. Each region uses a unique kite style. October is the traditional month for kite flying, but due to favorable winds kite flying season usually runs from the Chinese New Year through Qingming, the day for mourning the dead on April 5. 

We chose to make the Butterfly kite. The book describes it as a fair to good flier in light to gentle breezes. The Chinese often make and fly Butterfly kites because they represent beauty and a free spirit. There is also an old saying: "Only the greatest artists go to heaven to paint butterfly wings.


Kites have a long history in Malaysia as well. In fact some scholars believe Malaysia may have been the birthplace of kites. In Malaysia kites are called wau. A legend from the state of Kedah say the knowledge of how to build a kite is an effort to appease the heavens. If you visit northern Malaysia any time from April to June you will most likely see colorful kites flying. During this time they have monsoon winds which are strong enough to fly large kites and also it is after the rice harvest and is a time when farmers and fishermen celebrate life.

We chose to make the Mini Wau. The Mini Wau is a child's kite that is often flown from a stick. Since they believe the wau is a gift from the gods, they fly them in hopes of good fortune. This one I made out of tissue paper which the book said could be used instead of lightweight Silkspan.

Kite flying is very popular in Thailand as well. Oral tradition puts kite flying back in the 13th century when Thailand became a country. The earliest recording of kite flying was a ritual priests performed. They were also part of fighting war as well as just a love of the entire country. Kites often were entangled with the roofs of the royal palace. Eventually there was an edict forbidding flying kites over the palace. Based on a challenge of King Rammi II, a traditional kite game is established and is now a national sport held each March in front of the royal palace. 

We chose to make the Thai Fish kite. It is said to be a fair to good flier in gentle to moderate breezes. The fish is a major source of food in Thailand. It is second only to rice and since both are associated with water they are said to belong together. The fish often represents abundance.

Korea may have gotten kites from China during the period of the Three Kingdoms. Kites are called Yeon in Korea. Kites have not changed much in Korea over the centuries. Kite flying is part of many ceremonies and once again there are many stories of how kites were used. The kite flying season closely relates to the agricultural cycle. Koreans begin flying kites on the first day of the lunar calendar and the kite season lasts for fifteen days. There is also an annual custom of kite fighting. Kite fighting involves trying to cut the other kites' strings. They do not attach blades of any kind, but use skill of the flier and the specially prepared string to do this. Once cut, the freed kite belong to whomever can capture it. They have special kites for kite fighting called a bangpae-yeon or shield kite. There are also special kites to fly on the fifteenth day of the lunar calendar to fight off evil. Traditionally the flier of these kites releases the line after all of the line is out. These special kites include the aeg-mag-i-yon and song-aeg-yon. 

We chose to make the Ga-o-ri-yon or ray fish kite. It is fair to good flier in light to gentle breezes. It is a rhombus shape and resembles a sting ray in the sky. It is typical of children's kites all over Asia. 

During the seventh century Japanese civil servants brought the knowledge of kites and paper from China. Kites held a special importance in Japan and only the privileged class and monks could fly them. The monks used them to keep evil spirits away and invoke a rich harvest. The Japanese considered kites a way to carry petitions to the spirit gods. It is also a traditional Japanese belief that a destroyed kite's soul is released  and is free to be reborn in another kite. There are many Japanese folk stories involving kites. There are approximately 340 different traditional kites made in forty-two districts of Japan. Families share their heritage today through kites on special days like New Year's Day and Children's Day. There are also kite battles in May and June.

We decided to make a kao-no-tako or octopus kite. It is a fair to good flier in gentle to moderate breezes. It comes from Sanjo in Niigato (Japan's west coast). Tako means both octopus and kite. During the Edo Period, kite makers often hung these octopus-shaped kites in front of their stores as a sign of their occupation. 

Those are our Asian kites and some of the things we discovered about kites in Asia thanks to Asian Kites. Over the weekend I hope to share what we have learned about Children's Day in Japan as well as our craft of a carp wind sock (often mistaken for a kite). 

We are sharing this at the Multicultural Kids Blog Asian-Pacific American Heritage Month Blog Hop. If you missed our post co-hosting this blog hop, we shared some Asian-Pacific Island crafts and stories we have done and read to learn more about the cultures in that part of the world.

For more Asian-Pacific Island crafts and stories, check out:

Sharing Saturday 14-21


Sharing Saturday Button

It was another amazing party last week!! If you have not checked out all the great ideas shared, you should!! As always, they are so inspiring. Thank you to everyone who shared with us and to all who visited and commented on others ideas. We had a most clicked from In the Playroom: Sponge Painting: Van Gogh Starry Night.

http://intheplayroom.co.uk/2014/05/15/sponge-painting-van-gogh-starry-night/

Since a Van Gogh Starry Night project was most clicked, I thought I should share the other Van Gogh Starry Night project in case some of you missed it, so it is with some of my favorites below. But first here are a few Memorial Day and Outdoor Features. Monday is Memorial Day here in the United States.


Memorial Day and Outdoor Activities
1) From Some of the Best Things in Life Are Mistakes: Free Patriotic Printables Round-Up
2) From Every Star Is Different: Memorial Day Unit 2 With Free Printables
3) From Mothers Madness: Woodland Animal Hunt
4) From Left Brain Craft Brain: How Bubbles Work & 20 Things to Do with Them

A Few of My Favorites
1) From Mini Monets and Mommies: Van Gogh Art Activity: Kids' Clay Famous Artist Project
2) From Wesens Art: Bird Cage Made Of Newspaper
3) From Prettily: DIY Toy Drum Set
4) From Little Bins for Little Hands: Moon Sand Sensory Play Recipe
5) From All Done Monkey: Cloth Diapering Tips and Resources to Get Started!
6) From 3 Dinosaurs: Green Yarn Sheep -- Where is the Green Sheep?

Thank you to everyone who shared last week!! I hope you will join us and share again!! If you are featured here, please feel free to grab a featured button to display proudly on your blog. 

Photobucket


Featured Button Code:


From Your Hostess:
This week we shared a Middle Eastern Cinderella tale for Fairy Tales in Different Cultures, an Asian Pacific Island Book Round Up and Link Party for Asian-Pacific American Heritage Month, Painted Mickey and Minnie Mouse Tote Bags for our upcoming party, DIY Minnie Mouse Pinata with activity signs for the party, and a Zoo Scavenger Hunt.


Now for This Week's Party  
A Few Simple Guidelines:
1)  Please follow Crafty Moms Share via GFC (or one of the other ways that work for you).  

2)  Link any kid-friendly, child-centered post. Please no etsy shops or giveaways, etc.  Remember to link to your actual post. 

3) Post the Sharing Saturday button on your sidebar or somewhere on your blog to help spread the word.
Photobucket


4) I would love it if you would follow me on FacebookGoogle+, and Pinterest 

5) If you do not have a blog, but want to share an idea you can leave it in the comments or e-mail it to me with a picture (if possible).

 
 Disclaimer: By sharing here, you are giving Crafty Moms Share permission to use your photos for features and to pin your craft at Pinterest.

DIY Minnie Mouse Pinata & Free Party Activty Sign Printables

Disclosure: I was sent the black jumbo streamers to review free of charge from Oriental Trading. All opinions in this post are my own. I did not receive any other compensation for this review.


Mickey and Minnie Mouse Tote Bag Craft

So for Hazel's actual birthday party we had received these wonderful yellow tote bags from Oriental Trading for us to review. Our plan had been for guests to make handprint flamingos on them, however the guests did not want to, so we still had many of the bags. I thought they would be great favors and we could paint Mickey and Minnie Mouse heads on them. My original idea was to get a large sponge and cut it in the shape of a Mickey Mouse head, however I could not find a sponge large enough. Then I thought of the bottom of cups or plates or jars. I tried a few and asked Hazel which size she liked best.

DIY Mickey and Minnie Mouse Ears and Free Printable Party Signs


Our next craft for the Minnie Mouse themed upcoming party is ears of course. I tried to make ears last year before we went to Disney World. However they came out floppy. I decided to go back and figure out what I did wrong. I followed the tutorial at The Suburban Mom: How to Make Mickey Minnie Mouse Ears for a Party. She provides a free downloadable pattern. I used this pattern with some adjustments. I found the space between the two circles was too big for the size headband I used. I folded my pattern a bit to shrink it. This definitely helped in getting them to stand up. I also used the foam this time. I used two pieces of sticky foam and I used my 3-inch punch to make the circles instead of her pattern (which is a 3-inch circle).

Sharing Saturday 14-19


Sharing Saturday Button

Wow, what great ideas were shared last week!! If you have not checked them all out, you should!! There was not one most clicked, so I picked a few favorites in two categories for you. The first being spring and Mother's Day themed and the second being painting.


1) From Tot Schooling: Easy Mother's Day Pop-Up Card
2) From JDaniel4's Mom: Mother's Day Pictures for Homemade Cards
3) From Toddling in the Fast Lane: Magazine Flowers
4) From Sparkling Buds: Making Yarn Flowers Using Building Blocks
5) From Sparkling Buds: Easy Paper Flower
6) From Crystal's Tiny Treasures: Paper Plate Sunshine Craft


1) From Parenting Chaos: Paint With Flowers
2) From Mini Monets and Mommies: Kids' Nature Art Activity: Painting with Plants!
3) From Where Imagination Grows: Train Painting
4) From My Nearest and Dearest: 13 Fun Ways to Play and Create with Paint

Thank you to everyone who shared last week!! I hope you will join us and share again!! If you are featured here, please feel free to grab a featured button to display proudly on your blog. 

Photobucket


Featured Button Code:


From Your Hostess:
This week we shared our easy Minnie Mouse napkin rings for a birthday party, Hazel's garden/meadow to go with On Meadowview Street, our outdoor play and explorations, our needle felted acorn capped strawberry craft, and an easy pressed flower vases for gifts for teachers or moms made with a recycled jar.


Now for This Week's Party  
A Few Simple Guidelines:
1)  Please follow Crafty Moms Share via GFC (or one of the other ways that work for you).  

2)  Link any kid-friendly, child-centered post. Please no etsy shops or giveaways, etc.  Remember to link to your actual post. 

3) Post the Sharing Saturday button on your sidebar or somewhere on your blog to help spread the word.
Photobucket


4) I would love it if you would follow me on FacebookGoogle+, and Pinterest 

5) If you do not have a blog, but want to share an idea you can leave it in the comments or e-mail it to me with a picture (if possible).

 
 Disclaimer: By sharing here, you are giving Crafty Moms Share permission to use your photos for features and to pin your craft at Pinterest.