Google+
Showing posts sorted by relevance for query doll. Sort by date Show all posts

DIY Doll Checkers Game & Clipboard

Make sure to enter my current giveaway!!


We needed to go to Home Depot to get air conditioner filters. We have a friend from church who works at Home Depot so Hazel and I always take Steve's list to him and he helps us find everything Steve needs so Steve doesn't have to deal with Home Depot on a weekend. Hazel also loves to go visit our friend. I remembered seeing this pin for a doll clipboard and mistakenly thought it was sample floor tile, so we got two of those while we were there. Now the floor samples are square and did not make the perfect clipboard (I may go back for the counter sample).
While driving home Hazel commented how the square tile would make a good checkers board. She had fallen in love with the one at the American Girl Doll Store that came with the Fun and Games Table for $58.  We were able to make one for free! We got a wood floor sample from Home Depot and used a printed checker board (which I will provide as a download), Mod Podge glue, red and black foam sheets and a hole punch. You could also use a 4"x4" square of cardboard instead of the floor sample.

At first I made a typical black and white checker board, but Hazel wanted a red and black one, so I made another print out and covered the black and white one. For my printable, I offer both in case you have a preference or your doll does. All I did was cut the checkerboard out and use the Mod Podge glue to stick it to the wood sample and then put a thin coat of the glue over it. I used a glossy finish because it is what I had.

Now I was going to buy buttons to be the checkers, and I stopped at Joann Fabrics yesterday to see what they had for button sizes. I didn't buy any since I wanted to figure out the size of the squares first. Then last night I was trying to think about what else we could use for buttons and I was thinking of cutting them out of paper, but that would be too thin and I thought of foam. I went to our foam supply and got a regular hole punch (I was wishing I had a slightly bigger one) and punched twelve checkers from a red sheet and a black sheet. Sorry with the lighting the black ones are hard to see on the black squares.


Finally Hazel's dolls were ready to play a game. Hazel invited Mimi over for a game.
Hazel is getting ready to make the first move.
So instead of $58 to get a checkers game we made one for free! I thought about doing a box, but decided since the board cannot fold, not to bother. 

For more DIY doll ideas check out:
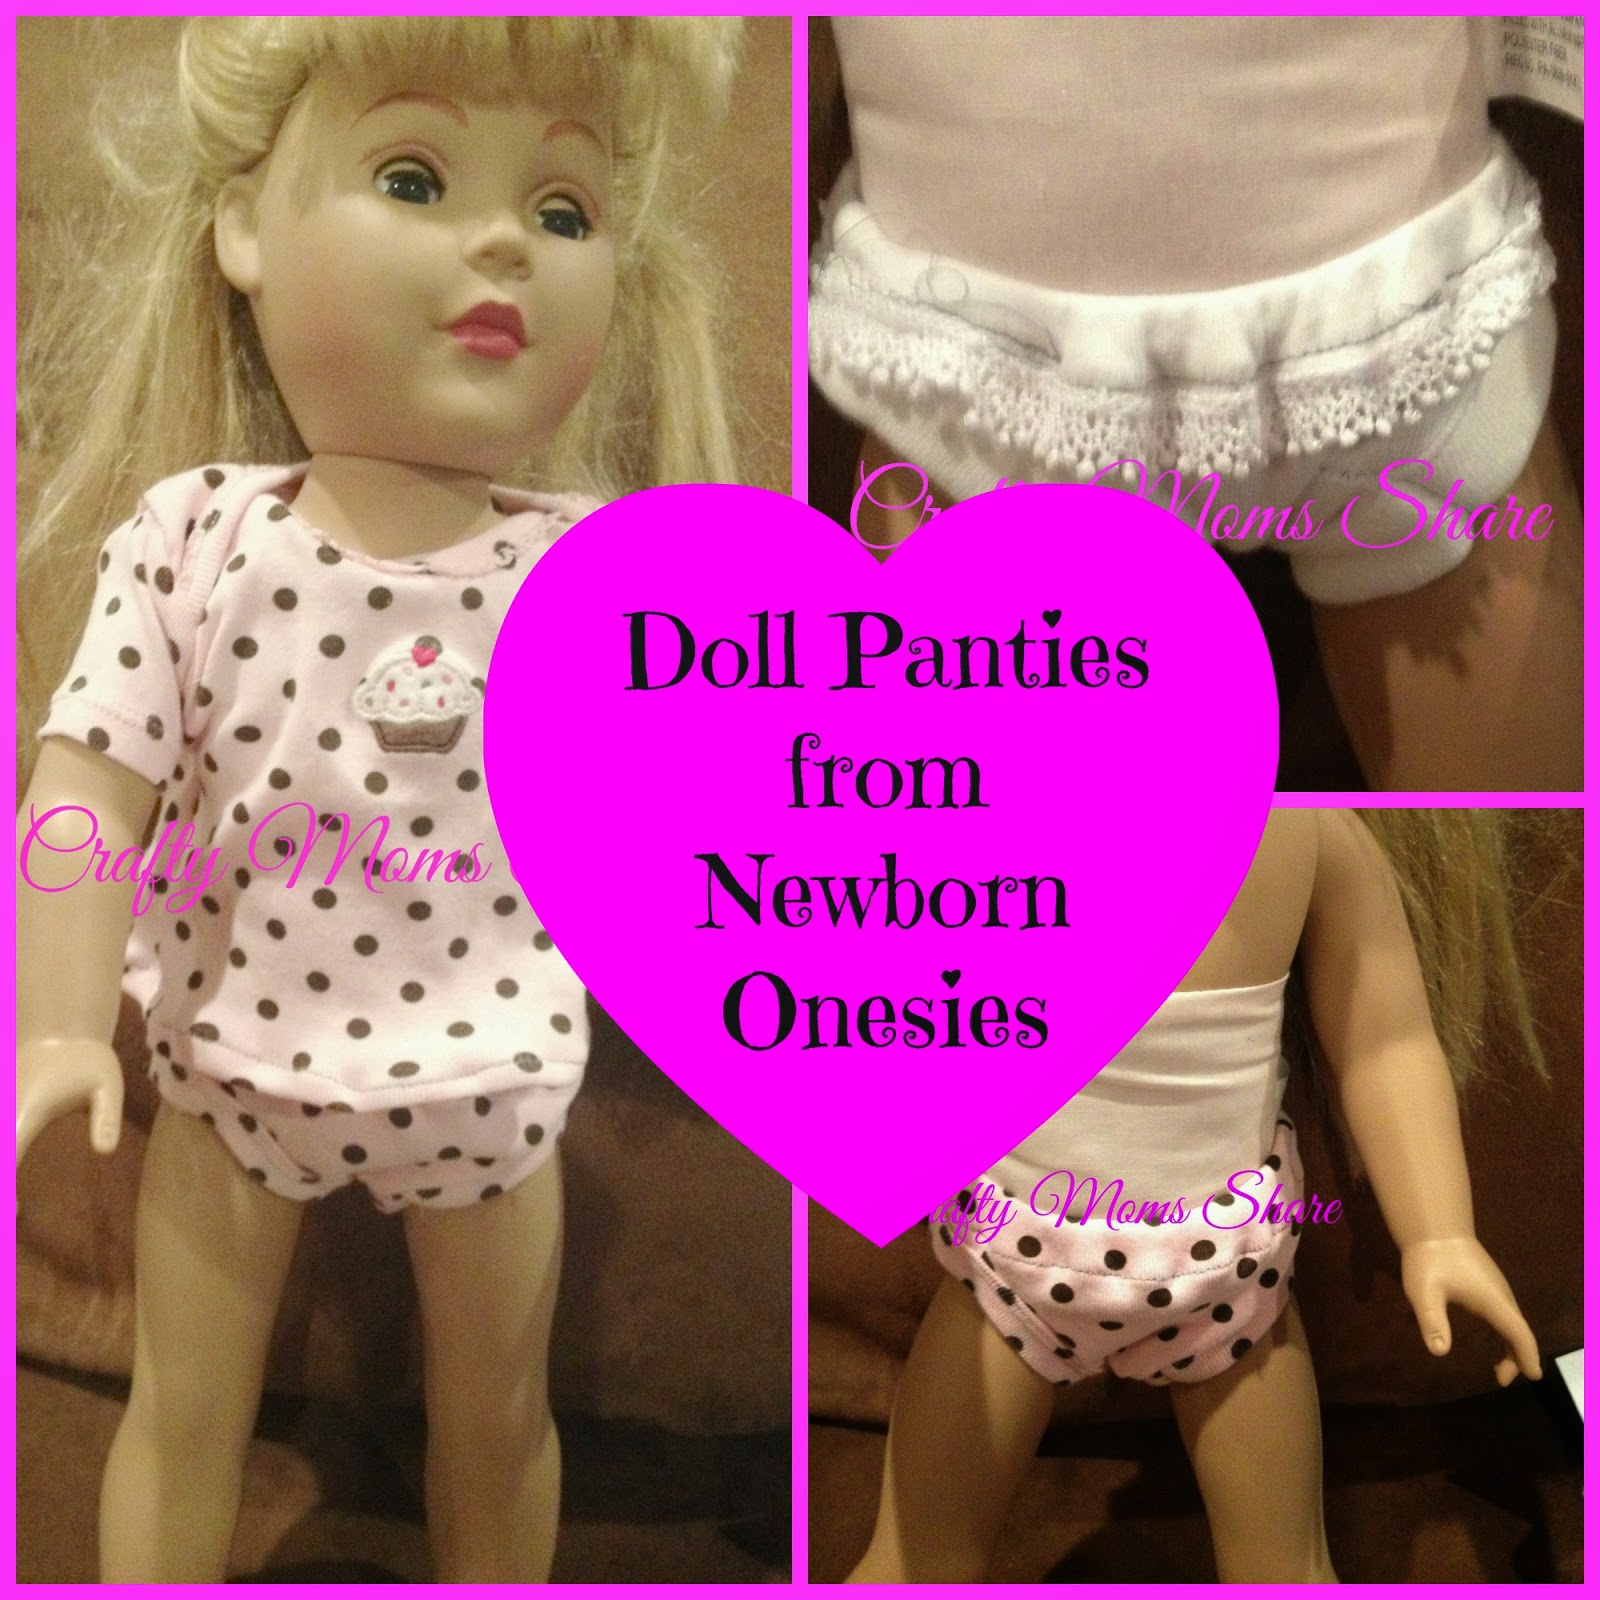
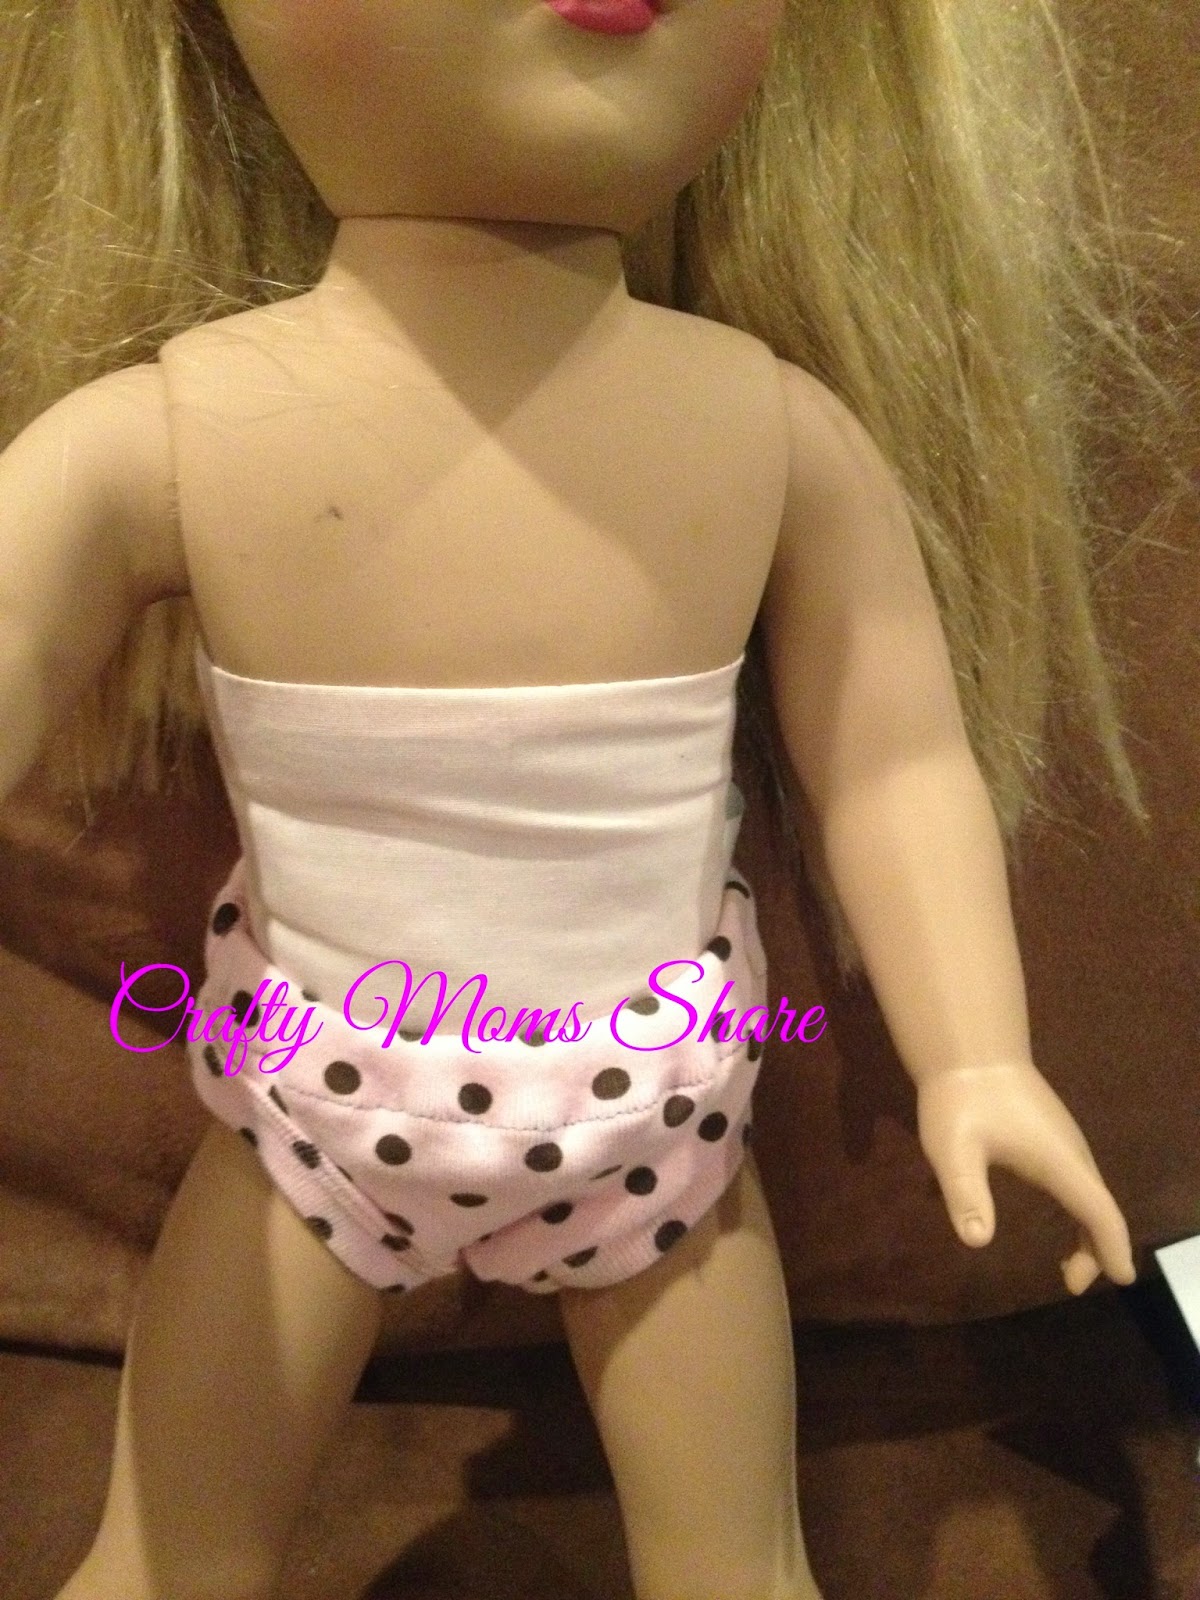
DIY A Doll's Valentine's Day Box of Chocolates

Today is Multicultural Children's Book Day! Be sure to check out all the great book reviews!
Note: Links are provided for your convenience, but I receive no compensation.

While exploring one of my favorite craft stores, The Paper Source, I found these cute little heart boxes that looked like the right proportions for a doll's box of chocolate for Valentine's Day. I bought one for Hazel's dolls. Hazel of course wanted to have four. One for each doll. I bought her three more with conditions of helping clean the house today since we are snowed in. First we painted the box red both inside and out. I was going to add ribbons and flowers, but we have not gotten that far yet.

DIY Doll Panties from Onesies And Inserting Elastic Tutorial


A few weeks ago I showed you how we made doll t-shirts from newborn onesies. Well one  of the things that really bothers me is dolls with no panties and naked dolls. (I hated the stage where we would find naked dolls all over the house. I'm so glad she outgrew that one.) I wanted to buy some panties for Hazel's dolls but was shocked at the prices. I hadn't gotten around to finding a good pattern to make any. Then I saw the bottoms of the newborn onsies that I had used for t-shirts and thought those could be panties. They are pretty easy to make and work as panties. They are not perfect, but since I already had the onesies they are free. So if you have already cut the onesies for a t-shirt you take the bottom and cut the snaps off. I just cut the cuff part off. Then you sew a seam there with right sides together. Next finish the waist seam with a zigzag or rolling seam and fold it down twice so you can fit 1/4-inch elastic through. Sew at the bottom leaving an opening for the elastic.
Next measure the elastic to the dolls waist (American Girl dolls are 10 1/2 inches) and it does not have to be perfect as long as it is not too big. Attach a safety pin to one end and insert the pin through the hole you left in the casing.
Move the safety pin around the casing pulling the elastic through, but make sure you leave a tail of elastic at the opening or you will have to start over. Once all the way around you will have both ends sticking out the opening.
Sew the two ends together to form a loop. Then stick the ends into the casing.
Then stitch the casing closed in the spot that was opened. Turn right side out and you have a pair of doll panties!
And they match one of the doll's t-shirts for perfect underwear combination or pajamas!
I made some for each doll. On the plain white pair I added a little lace to dress them up.
Now I hopefully won't find naked dolls. They can at least have their panties on!

For more doll ideas check out:


Pinned it and Did it! Doll Clothes

We have been very into dolls lately and I have been looking at patterns on-line. Now for 18-inch dolls,  Hazel has two What a Doll dolls from Kmart, a BFC doll and a You & Me Doll from Toys 'R Us. The BFC doll is super skinny and an older girl with breasts and jointed everywhere. She came in a bathing suit. The problem being that her straps would get caught in her shoulder joints and then her chest would be completely exposed. I had to make her a dress. I found a simple pattern on Wren-Feathers: Summer Sew-Along Week 7.  She has many great doll patterns on her blog!! Check it out!

I also saw lots of ideas on using baby clothes to make doll clothes.  Since we donated most of Hazel's baby clothes except a few favorite things, we had to purchase some new onsies and a newborn outfit. The first thing we tried was adjusting old baby dresses like the ones I saw at Doll It Up and A Doll for All Seasons. However I started by adjusting one of our favorites of Hazel's baby dresses.  This dress was a 6-9 month size. It had been a gift for Hazel's baptism. I just adjusted the side seams to make it fit the dolls. It is a bit long on them because it was so big, but I didn't want to adjust the length.


Here is Hazel in it as well. I also adjusted the headband so the dolls could wear it.
While shopping we found the cutest newborn outfit/dress. We thought it looked the right size for two of Hazel's baby dolls. 

It fits pretty well except the onsie part underneath is a bit too long, but since you cannot see it with dress, I didn't bother adjusting it or cutting it off.


The final idea we had was to use newborn onsies to make tee shirts like I saw at Nest Full of Eggs. I have not finished the edges yet, but Hazel wanted to use them right away. To make these you simply cut the bottom part of the onesie off. Then finish the edge. 


We also found a pair of 3 month onsies with flamingos on them. I cut the simpler one of them and made a doll night gown. The other one has tulle ruffles it, so I think I am going to try to make it into a dress.


Tomorrow I will share my birthday party at the American Girl Doll Store. Yes, we did it for Hazel, but since my birthday is coming up my mother-in-law went all out for the celebration. 

For more doll ideas check out:

Cheap Finds: Doll Accessories to Buy or Make


After our big adventure to the very expensive American Doll Store I wanted to find or make some of the things Hazel wants for her dolls at a better price. One of the things she really liked at the store were the doll binoculars that came with the Trail Accessories. Since she really only cared about the binoculars I could not see spending the money on the whole set. I then googled doll binoculars and discovered there really are not many out there besides American Girl ones. We decided to check Target and Michaels just in case, but no luck. Then we hit the Dollar Tree and I saw these.

We thought they would make perfect binoculars similar to the ones at the store. (I had many ideas to make them, but Hazel wanted them small like the stores.) So here is what we did. We used two matching pencil grips, the same color lacing (also bought at Dollar Tree in a package of six colors), two star shaped (but any larger bead will work) beads, two clear faceted beads that will fit in the holes of the pencil gripper and two pony beads. The tools we needed were a kitchen skewer, a large-eyed needle (the lacing needs to fit in it), and craft glue. The first step is to use the skewer to poke through both grips. Then thread the needle with the lacing and pass it through one grip, a star bead and the other grip. Pull the lacing through and give yourself a good amount so you will be able to tie it to go over the doll's head. Then I glued the bead into place. Then glue the second bead toward the other end of the grips for stability.

I put the clear beads in the end away from the strap and the pony beads in the ends where the eyes go. I found putting the grips between two heavy items help the glue set correctly. Then cut the lacing to the length you want and tie the end so it will fit on the doll. Once the glue dries your binoculars are ready to use!

Now the Trail Accessories also included a trail mix package. I have something similar to print out and make from Paper Minis. Ann Vanture of Paper Minis offers a complimentary project with each month's newsletter. She often offers them in different scales: 1/12 (dollhouse), 1/6 (Barbie doll) and 1/3 (18-inch doll size). To sign up for her newsletter and have access to all of her complimentary projects e-mail her at:  ann-vanture@paperminis.com . Many of the projects include packages of food, so check them out. It is free!! And she has even more amazing projects to buy at her store.


On our shopping adventure we found some great things to use with the dolls. We found the notepads pictured above at Michaels. They came in a package of 18 and were on clearance for 60% off making them around $1.20. At the Dollar Tree we found a lantern. The original one we bought had a palm leaf top which was removable, so we took it off. It is larger than the one American Girl has with the tent, but it will work.

 
If you put batteries in, it will really work. Next I need to make Hazel a tent for her dolls.
We also found a tea set at the Dollar Tree. Hazel loved the fact that it came with spoons for the dolls, so I spent the $1.


Then I found a package of green apples and one of red apples that were doll sized.
In this picture you can see how the sizes compare to the dolls. Aren't they perfect?


We have a few more crafts to make and will be sharing them as we make them. Stay tuned!!


For more doll ideas check out:


DIY No Sew Doll Purse


Sorry for being a bit sporadic this week. For the first time in our almost eight years of marriage I have gotten the house to myself for a couple of days. The main reason is for me to organize my extremely messy and useless craft room. Well, I got a good start on it!!

Today I wanted to share a simple way to make an 18-inch doll a purse. I was inspired by the tutorial over at Doll It Up: Make a Doll Purse Out of a Coin Pouch. I had bought a coin pouch at Rite Aid from the $1 bin, but I hadn't gotten around to making it like the one over at Doll It Up. Then when we were at Michaels the other day I saw this adorable panda head coin pouch on clearance for under $1 and knew it would make a perfect one. Hazel has been really into pandas lately.

To make it all I did was measure a piece of red ribbon so it would hang on the doll the way I wanted it to. I cut the ribbon a little long so I could fold the ends in and cover them. I glued the ends down and then glued the handle back over the end. I didn't want to try to sew the vinyl or whatever the coin pouch is made of. After the glue dried it was ready for Hazel (the doll) to use.
For more doll ideas check out:


Doll Sized Starbucks!


The other day Hazel and I were at Starbucks (a favorite place to go of ours) and we noticed the adorable cup ornaments they have for sale. We realized they were the perfect size for the 18-inch dolls. Hazel of course had to have one, so we bought one. My plan had been to wait until after Christmas and buy her some more on clearance, however when we were at our normal store one of the managers informed me the tend to sell out quickly, so I should buy them now. We did. Hazel was so excited to play Starbucks with her dolls. 


DIY Wooden Doll Table


Continuing with some of our DIY projects for 18-inch dolls, I made Hazel a table for her doll. I had her pick out a plaque at JoAnn Fabrics and Crafts the other day. It was $2.99. For the legs I used clothespins and woman peg dolls. I glued one of each together and let the glue dry and then glued them on. Once the glue dried Hazel wanted to try it out. Here it is with a tea party and her Hazel doll.


Next I painted it white (well actually I reglued some legs since she insisted on taking it to Nonni's and it does not travel well). To make a stronger table you could use spindles instead of my cheap version. 


Then I wanted to share a cheap find. We found this magnetic chalk board that is doll size for $1 at Target, I believe. It came with a piece of chalk.

It is made to put in a locker, but that makes it the right size for dolls. Here it is on the table.


Now her dolls are really ready for their tea party and ice cream party! 

For more doll ideas check out:


Mamie Phipps Clark -- #blacklivesmatter -- the Black Psychologist Who Helped End Segregation in Schools


Today we are continuing our Black Lives Matter Series. Today we are getting to know about Mamie Phipps Clark. She and her husband, Kenneth B. Clark, helped end segregation in public schools. Kenneth often said he piggybacked on his wife's research and tried to give her more of the credit, but he often is the one who is credited still, so we are focusing on Mamie. I find her work and life so fascinating. She dealt with racism and sexism throughout her life and worked towards what we are still fighting for--equal rights. Even now her husband gets more credit for the work that was originally hers which he decided to participate in after she started it. Plus her most famous study was a doll test involving white and brown dolls. Now I have shared one of my biggest regrets of not saying something to a young Black girl at a store when she thought the white doll was more beautiful than the Black doll. This one hit me personally. Plus her work was used to end segregation. I think back to my own years of schooling and think of how much learning about other cultures from my friends of other races added so much to my life and still does. Plus to my own classrooms and how the mixed races always made the classes more interesting and a better experience. So with those thoughts, I would like to introduce you to Dr. Mamie Phipps Clark.

Sewing Leather Doll Clothes Review and Giveaway!!


Disclosure: I was sent samples of leather for free to write this review and use in my church event but was not compensated in any other way. All opinions are my own.

Today I am going to share my first experience with sewing with leather. I was approached awhile ago by Leather Hide Store and Kyson Leather to see if I would be interested in creating something with leather and reviewing it here. I struggle with what to make with leather. I started a Pintrest board on Leather Projects to get inspired. I was not sure if I wanted to make a bag, a purse, or something totally different. Then I decided to make Hazel's doll some leather clothes.

Now Hazel has asked Santa for a "Hazel" doll--a doll that looks like her. I found a Madame Alexander What a Doll doll with brown hair and brown eyes at KMart and it happened to be on clearance (which I did not realize when I picked it). You can see her above. I have not completely taken her out of the box yet so her hair will not get too messed up. I figured since she loves to change her dolls clothes and have them have purses, I would make her a leather jacket, purse and boots and I would make them bright pink since that is her favorite color. I figured since it would not take much leather to make this, I could make two and give one away to a lucky reader. Well, they loved this idea and also threw in a $25 gift certificate to go with it so the winner can experience working with leather as well.

Now while I was trying to decide what to do, Leather Hide Store sent me three pieces of remnants for my church's Night in Bethlehem which will be Saturday. One of the pieces was used to be a map of the journey Mary and Joseph took from Nazareth to Bethlehem. The other pieces and some scraps from the first piece will be used to decorate our Leatherworking Shop in our Marketplace. The Bethlehem Marketplace will have eight shops where a demonstration will be done or a craft will be made by the families visiting. The Leatherworking Shop will have leather lacing to make into bracelets, so we just needed something to help give it the leather feel and smell. All of us at my church are so thankful for this amazing donation.

While I was waiting for my magenta leather, I started looking for some patterns for doll clothes that might work with leather.  I found two McCall's patterns that had different things I liked. I luckily got them on sale at Joann Fabrics when they were 5 for $7. Then I talked to my mother who told me I needed to get special needles for my sewing machine. I found them at Joann Fabrics as well and while I was there I asked if I would need special thread. They suggested getting an upholstery or craft thread so it would be stronger. I found the perfect color in a denim thread and figured this should work.  I also did some research on line for suggestions when sewing with leather. World of Pineapple has some great leather sewing tips and tricks.


The magenta leather came and I could not wait to try sewing with it. The first thing I made was the two purses. I used the McCall's MP327 (the pattern pieces had the number 6669 instead). I bought some sequined appliques for them instead of trying to make the one the pattern had. I have to admit one of the hardest things to sew was the straps for the purses. Doll scale made it a bit harder to work with the thickness.

Doll in Giveaway Outfit
Then I started on the boots. I used McCall's MP325 (the pattern pieces had the number 6804 instead) for the boots and jackets. After making the four boots, I started the jackets. I intended to make the jackets identical, but I started following the wrong jacket instructions and missed sewing on the collar on one. Now some tips for working with leather. Copy the pattern pieces onto the wrong side of the leather. You cannot use pins since the holes will not go away. You can use clips like paperclips or clothespins. One of my favorite things was you did not have to finish the edges like you do with other fabrics.

Doll in Hazel's Doll Outfit
I grabbed one of Hazel's other 18-inch dolls to model the outfits for us since I have not taken her Christmas gift out of the box completely. Our plan is to have her new doll sleeping in a sleeping bag under her small tree in her room with the fancy dress hanging on the tree. I have to finish the dress and make the pajamas for the doll. I also want to make matching pajamas for Hazel. I found some cute gingerbread men flannel to make them.

Ok, back to my review. I have to say how wonderful it has been to work with  Leather Hide Store. They are a family run business and have been in business for eight years. They sell at Leather Hide Store website or on ebay as Kyson Leather. My experience with them is that they are a company that remembers what customer service is suppose to be. They will send you five free samples, and if those five do not work they will send you five more and this is without entering payment information. The quality of the leather they sent me was wonderful and I am so happy I had this experience. I expect I may have to get some more magenta leather to make a purse for Hazel so she can match her doll (my purse happens to be the same color too). So if you are looking for leather for a project, please check out Leather Hide Store. I know you will not be disappointed.

Now for our giveaway. You can enter to win one leather doll outfit which includes a pink leather jacket, pink purse and pink boots. (I made all of them and will admit they are not perfect, but I know any child would love them for her/his doll.) The clothes should fit most 18-inch dolls.  In addition to this, Leather Hide Store is adding a $25 digital gift certificate. To enter you need to follow my giveaway rules and follow the Rafflecopter. The giveaway ends on December 16th so I can get the outfit to you hopefully by Christmas depending on the mail!

 a Rafflecopter giveaway