My job this week is to try to keep Hazel entertained and quiet during the mornings and early afternoon so Steve can sleep since he is working the overnight shift to help restore power to the people of Massachusetts (and Rhode Island and maybe New York). Last night or this morning I should say Hazel woke me up at 1 a.m. wanting to sleep in my bed and have some milk. Steve woke us up at 2 a.m. coming in. He somehow finished all his work for the night early and was allowed to come home. So this morning after breakfast and play time, Hazel and I took a walk and then ran errands though Steve was up after our walk. Oh, and we went to our local library for story time. After story time we went to the very small weekly Farmer's Market. This summer Hazel discovered corn-on-the-cob and loves it, so we bought some. We also got some peaches (I hope they are better than the ones I have been getting at the grocery stores because I have not been impressed this year with them), apples, cucumbers, kale, honey, and an apple pie for Steve and apple cider donuts. For the most part donuts do not excite me anymore. I think they are ok, but not worth the calories, however I love apple cider donuts. I think this fall I may look into making some. I just googled some recipes to try. I remember making homemade donuts when I was a child as a fun activity, so hopefully we can start a fall tradition.
On our walk this morning Hazel and I collected acorns. Hurricane Irene seems to have forced many down a bit early. Some are on her nature table along with some leaves we collected yesterday on our short walk (and pinecones, shells, rocks, etc.) The rest I'm hoping to use in some fun crafts. So far I have come up with acorn fairies, acorn people, acorn pumpkins, acorn wreath (though this looks like it would be for older kids), and of course just gluing along with fall leaves and pine cones to make a wreath or napkin rings. Do you have any good ideas for acorn crafts?
One of the errands today was a trip to Michaels. I bought some wooden frames and Mod Podge. I bought some small squares of tissue paper awhile ago. I'm going to have Hazel Mod Podge the tissue paper onto the frames and then seal it with another coat. I'm thinking this may be some Christmas presents. We'll see how they turn out.
I'm also looking for some good ways to make clothespin dolls. I found in my supplies a package of different race colored clothespins. Hazel is wanting to use them for fairies or something, so I think I may be doing some of that soon as well. I think the next fairy I want to try though is with wool roving. I bought some more wood beads for the heads.
Well that is where my mind is. Have a great night!

Showing posts sorted by relevance for query fairies. Sort by date Show all posts
Showing posts sorted by relevance for query fairies. Sort by date Show all posts
Halloween Children's Book and Needle Felted Characters
 |
| 21 Days left until Halloween |


I did the bat in a similar fashion making a small ball out of black and the wings were similar to the arms but flatter.
For the vampire, I used white for the face. Then I used black and red for the eyes and mouth. I tried to add fangs, but they blended in with his face a bit. Then I did the arms and body similar to how I did the witch.
I haven't figured out a way to do the mummy yet, which is why she didn't get one. Still thinking about it.
Today I'm hoping to plant some fall bulbs and the lavender plant I bought at the farmer's market this weekend. I'm hoping to get Hazel out digging in the dirt with me. She hasn't been as afraid to get dirty as she use to be. Have a great day!!
How to Ride a Dragonfly -- with Dragonfly Fun Facts & Craft Round-Up

Summer has begun! Today I am sharing a fun, fantasy picture book that is perfect for some summer fun. It is How to Ride a Dragonfly by Kitty Donohoe and illustrated by Anne Wilsdorf. It is recommended for ages 4 to 8. I am also including fun facts about dragonflies and a craft round-up.
How to ride out a hurricane...
Well Hurricane Irene came and went. We spent the day home trying to keep busy. The only time the tv was on was to check the weather and when Hazel was sleeping.

One of our first activities was to make Hey, diddle diddle mobiles. We got the print out from Free Kid Crafts. You need to print out 2 for each mobile, but one needs to be the mirror image. I did this by saving it as an image and putting it into Word and flipping the picture with the rotate tool. Then we colored and cut out. We added in the arms and legs to the dish and spoon and gave them extra long strings to run away on.
 Next we danced. Hazel finally wore her Beatrix Potter twirly skirt (and wore it today to nonni's house).

 And during nap time I finished a new outfit for her. I made the pants Saturday night. And finished the top yesterday. Unfortunately we had a potty training accident before we went out today in it. These patterns came from Little Girls, Big Style by Mary Abreu. Very cute clothes to make for girls sizes 2-6. Definitely recommend this book if you like these styles.

Our final craft of the day was to make flower fairies. We got the instructions from Family Fun. Hazel loved doing this though she needed a lot of help. We made three each and she took them with her today to show Nonni. I'm thinking she can use them in her fairy garden to play. Plus it used up some of the extra supplies we had from the fairy garden.
Now the hard part of the hurricane (or any storm) is on me. I have to entertain Hazel and keep her quiet while her poor father sleeps since he worked overnight. The one draw back of working for the power company is when the storms hit he is called in. Oh, well. Today she is with Nonni (his mother) and tomorrow I'll make some playdates or something. The weather is beautiful now, so I'm off for a walk. Enjoy!

 |
| And the dish ran away with the spoon |
 |
| The little dog laughed to see such sport |
 |
| The cat and the fiddle...the Cow jumped over the moon |


 |
| Where the pattens came from |


Our final craft of the day was to make flower fairies. We got the instructions from Family Fun. Hazel loved doing this though she needed a lot of help. We made three each and she took them with her today to show Nonni. I'm thinking she can use them in her fairy garden to play. Plus it used up some of the extra supplies we had from the fairy garden.
 |
| Flower Fairies |
Fall Crafts Capturing the Beauty of Autumn Leaves

Last week I shared some autumn crafts including leaf embroidery. I promised another fall craft if it worked and it mostly did. So today I am sharing how to make a leaf bowl. Now I saw photographs all over the place like this one for inspiration. I went outside and picked some beautiful fall leaves. Then I wiped them and let them dry for a few hours. I gathered a plastic cup, a balloon, a paintbrush, and my ModPodge. When I was ready I blew up the balloon and put it in the plastic cup. The cup works as a stand so you do not have to hold the balloon in place. Put the knotted side down into the cup. Then I spread some ModPodge on my first leaf and stuck it on to the balloon. I then spread more ModPodge on the other side of the leaf to get it really stuck. I continued doing this trying to overlap the leaves.
St. Patrick's Day Cards and More Spring Fairies
 |
| Our First Spring Bulb Has a Flower! |


And the insides:


Spring and Easter Crafts


This is messy, so make sure you put the newspaper down! They also can drip while drying, so leave it there for the first bit. The nice part of the flour water paste is that it cleans up fairly easily. This is a simple paper mache of dipping the tissue paper into the homemade paste and smoothing it onto a balloon. Some are smoother than others, but when making with a three-year-old we are not looking for perfection.


Having recently seen Marie's of Softearth World post on Thumbellina, I bought them with that in mind. So I pulled out some peg dolls and made them into fairies to match the blue flowers.


We have been a little behind on switching her tree to spring so these will help.
Ok, that catches you up on all of our crafting this week. What have you been up to? I hope you will come back and share at Sharing Saturday! And if you have any family time related posts please come share at Happy Family Times each Tuesday.
Fairy Tales in Different Cultures & Fairy Tale Baking!

Now I have been planning on reviewing these two amazing books from Crocodile Books USA. I had planned to write this review on Monday, but this week has gotten away from me, so here I am writing it on Wednesday. I am planning however on bringing back Fairy Tales in Different Cultures back in the new year, so stay tuned!! Our first book for today is The Crystal Mountain retold and illustrated by Ruth Sanderson.
Non-Scary Halloween Part 1 -- Peanuts Party, Teal Pumpkin & More

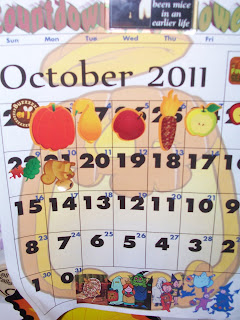
It is October and this is Hazel's least favorite month. Many of the Halloween decorations and costumes scare her. In fact there are only a few stores she will go into with me this time of year. Yes, just seeing the Halloween displays can give her nightmares. But she does love to dress-up and loves to trick-or-treat in our neighborhood, so I always try to find a friendly way to celebrate Halloween. Last year we did a Christian Halloween party. This year Hazel discovered Snoopy and the Peanuts gang so thanks to Oriental Trading we are hosting a Peanuts themed Halloween party.
Fairy Houses, Fairy Gardens & More


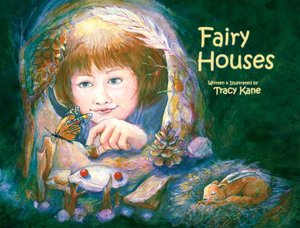 Hazel has been getting into fairy houses a bit more since we discovered the book Fairy Houses by Tracy L. Kane. It is a wonderful book about a girl whose family takes her to an island off the coast of Maine and in the woods there is a place where people build fairy houses following the rules of the woods which are posted. At the end of the book, there are ideas for building fairy houses in all four seasons.
On our walk through the woods at Mass Audubon, we looked for fairy houses or at least good places for one. We liked this one below. A fallen tree with another tree winding around it. It looked magical to me.


My plan this year is to take Hazel to pick out plants/flowers for it and find a good container to put it in. Then we can add the rocks and furniture, etc. We shall see where Hazel's imagination takes us this year.
How about you? Will you entertain some fairies this year?
My Adventures in Needle Felting

 | |
| One of Hazel's favorite books |
 |
| My Rainbow Fish |
Next I found Wool Pets by Laurie Sharp at the library. I tried a few animals from there without much luck. I showed my mother my attempts and we agreed I did not needle them enough.

The other day I pulled out my supplies. Actually I pulled out the roving to make the fairies and while it was out I decided to try some needle felting again. I started small. I made a flower (with a mold) to attach to the dish. I liked it and made some to go all the way around. Then I did a little heart for the spoon. I was very happy with the results.
 | |
| The Dish |
 |
| The Loving Spoon |


Then I had seen on line at The Magic Onions a tutorial to needle felt a pumpkin. I did not have much orange roving, so I decided to hold off on trying this. However, I decided to try an apple on my own. I figured I had plenty of red and different shades of green to give it a try. I followed the directions in the book on how to make a sphere and expanded it into the apple shape. Then played with colors to get different shading and added a stem and leaves and even put a little dark brown on the bottom for the core/flower piece. I was very happy with it.
So I think I have overcome my fear of needle felting and am looking forward to trying more with it. First I need to get some more supplies. Enjoy your weekend!
 | |
| My Apple Creation |
Subscribe to:
Posts (Atom)