Google+

DIY Doll Panties from Onesies And Inserting Elastic Tutorial


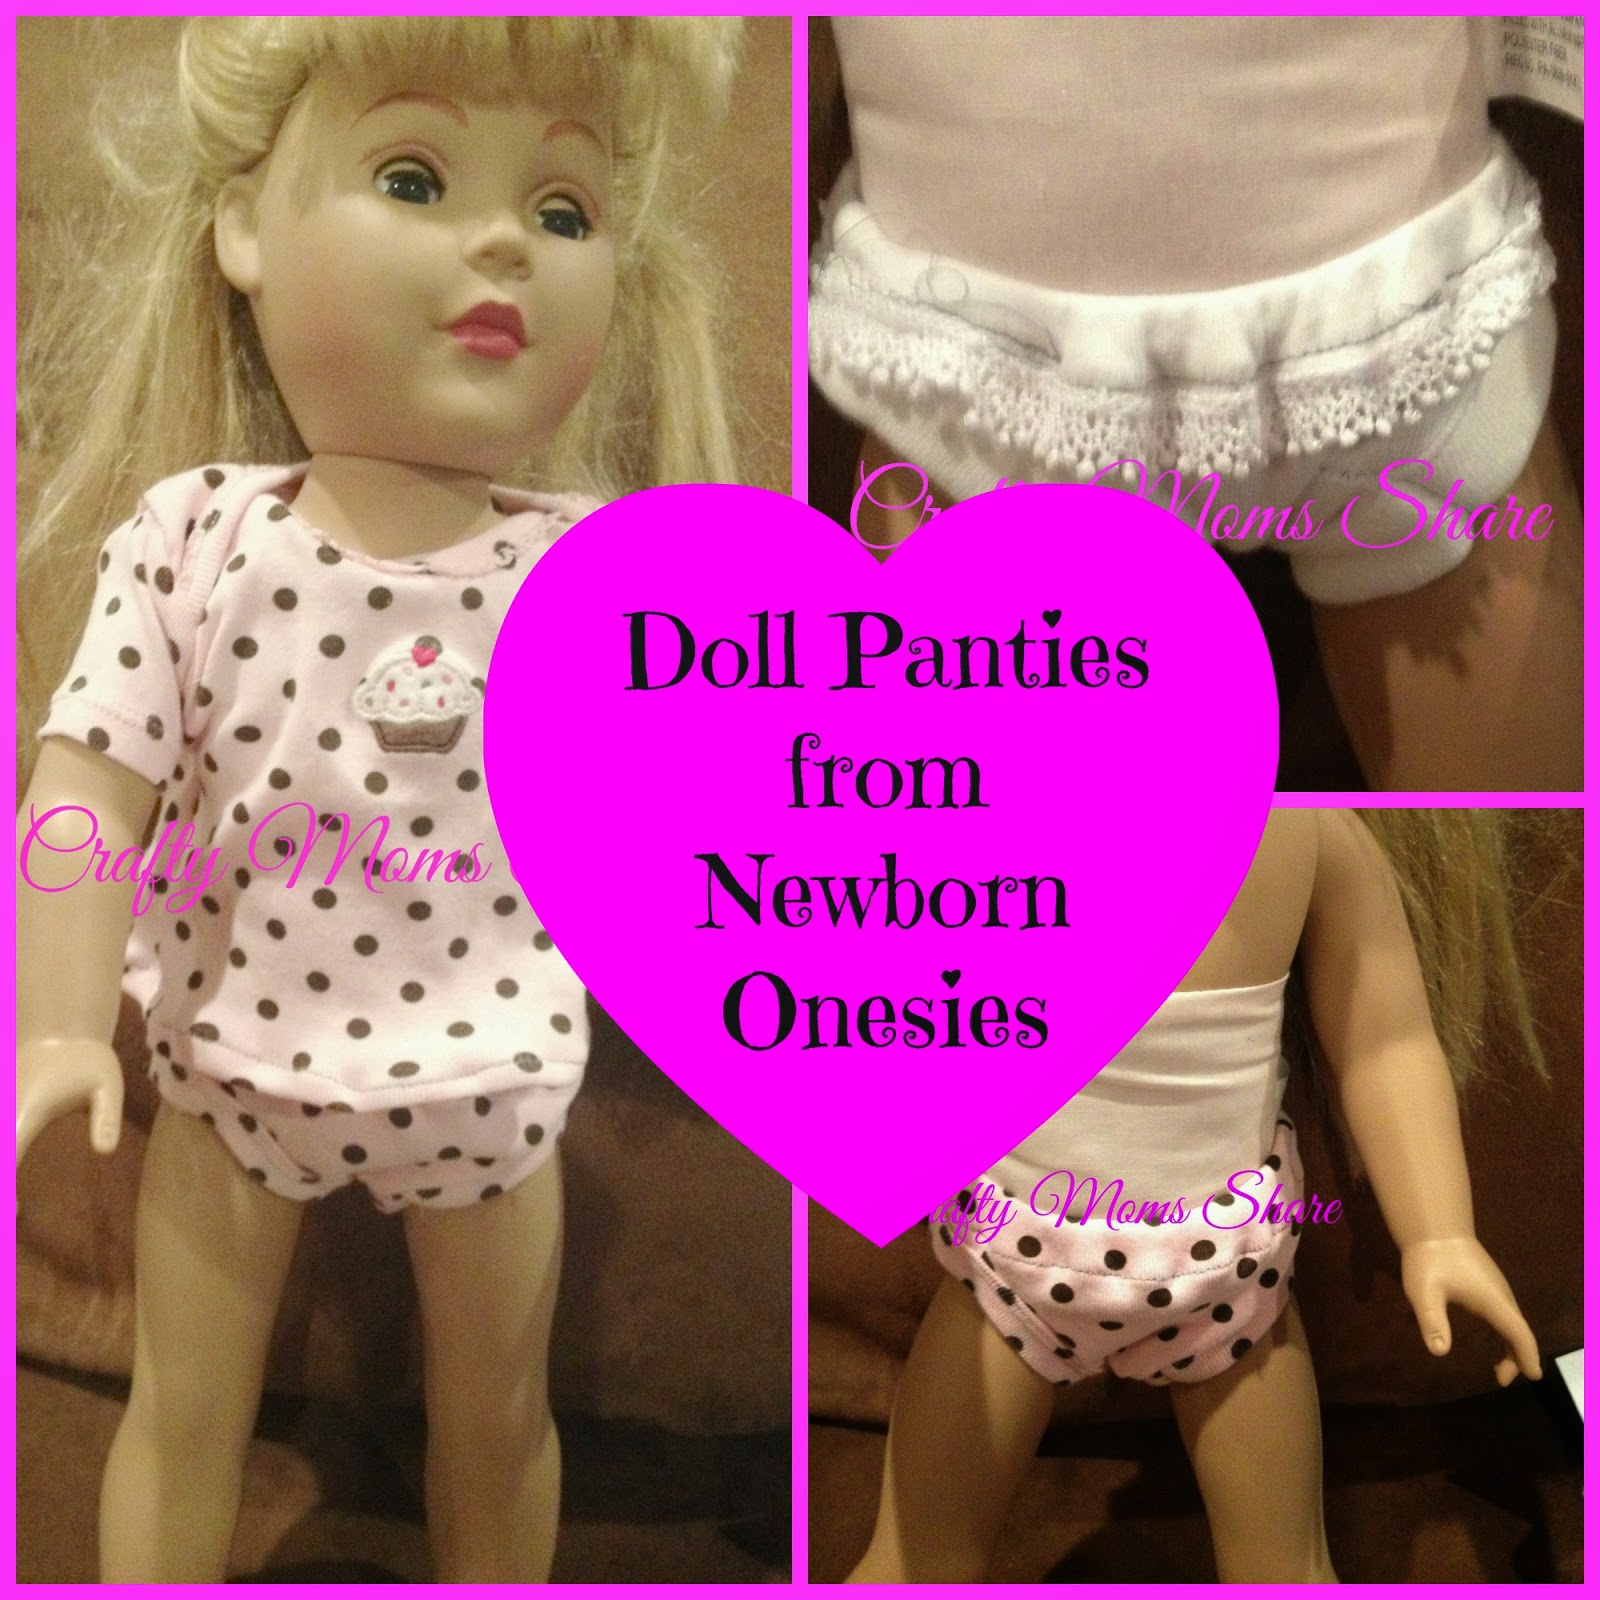
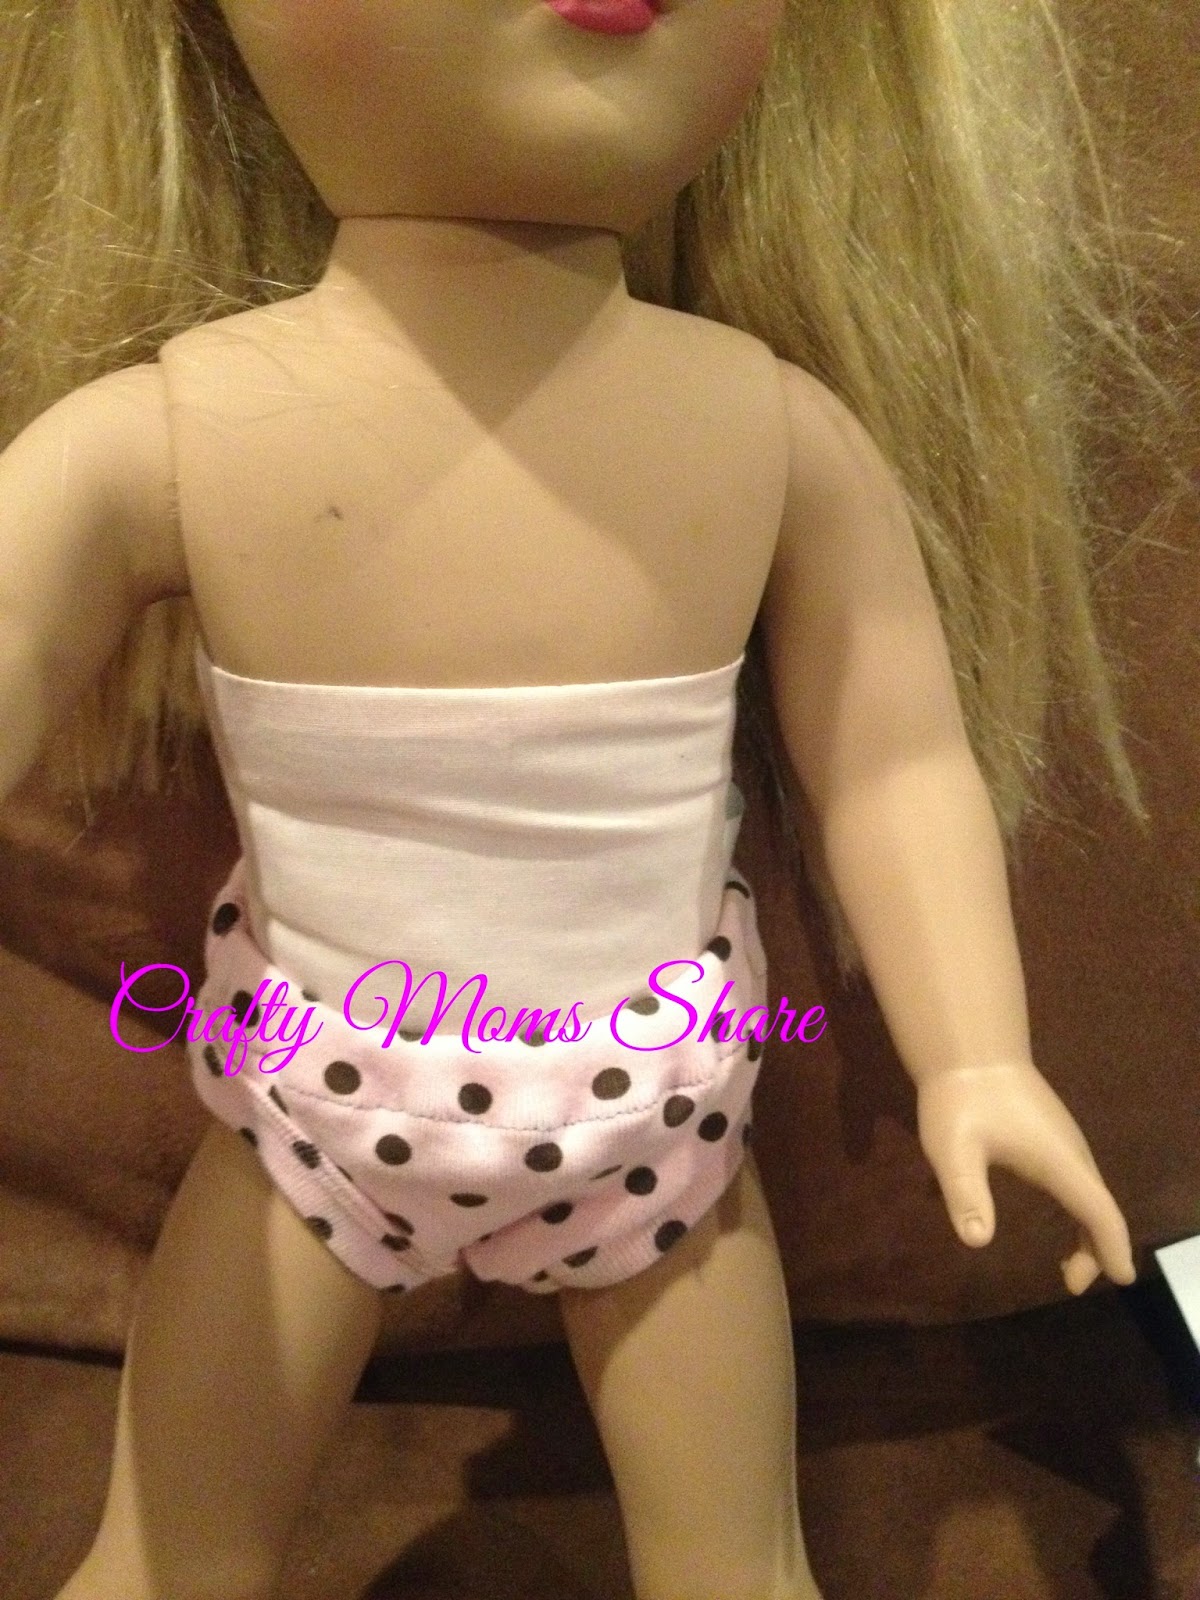
A few weeks ago I showed you how we made doll t-shirts from newborn onesies. Well one  of the things that really bothers me is dolls with no panties and naked dolls. (I hated the stage where we would find naked dolls all over the house. I'm so glad she outgrew that one.) I wanted to buy some panties for Hazel's dolls but was shocked at the prices. I hadn't gotten around to finding a good pattern to make any. Then I saw the bottoms of the newborn onsies that I had used for t-shirts and thought those could be panties. They are pretty easy to make and work as panties. They are not perfect, but since I already had the onesies they are free. So if you have already cut the onesies for a t-shirt you take the bottom and cut the snaps off. I just cut the cuff part off. Then you sew a seam there with right sides together. Next finish the waist seam with a zigzag or rolling seam and fold it down twice so you can fit 1/4-inch elastic through. Sew at the bottom leaving an opening for the elastic.
Next measure the elastic to the dolls waist (American Girl dolls are 10 1/2 inches) and it does not have to be perfect as long as it is not too big. Attach a safety pin to one end and insert the pin through the hole you left in the casing.
Move the safety pin around the casing pulling the elastic through, but make sure you leave a tail of elastic at the opening or you will have to start over. Once all the way around you will have both ends sticking out the opening.
Sew the two ends together to form a loop. Then stick the ends into the casing.
Then stitch the casing closed in the spot that was opened. Turn right side out and you have a pair of doll panties!
And they match one of the doll's t-shirts for perfect underwear combination or pajamas!
I made some for each doll. On the plain white pair I added a little lace to dress them up.
Now I hopefully won't find naked dolls. They can at least have their panties on!

For more doll ideas check out:


Sharing Saturday 14-33

Sharing Saturday Button

Thank you to everyone who shared with us last week and to all who took the time to visit all the amazing ideas shared. We did not have a most clicked, so this week I am featuring some new painting ideas, back to school and first day of school ideas as well as a few of my favorites.


Painting Features

1) From P Is for Preschooler: Magnet Painting

2) From Inspired Montessori and Arts at Dundee Montessori: Doily Prints


First Day of School and Back to School Features

1) From Little Bins for Little Hands: Early Learning Play Ideas

2) From Planet Smarty Pants: Back to School for Gifted Learners

3) From Krafts and Kiddos: Back to School Printable

4) From Lou Lou Girls: The First Day of School Celebration

5) From Living Montessori Now: 100+ Back-to-School Celebration Ideas


A Few of My Favorite Features

1) From Crystal's Tiny Treasures: First Nations Activities for Kids

2) From In the Playroom: Tissue Paper Butterfly Craft

3) From Mosswood Connections: Cooking Play Date

4) From Growing Book by Book: Environmental Print Billboards

5) From Two Keck Girls: DIY Pom Pom Rug

Thank you to everyone who shared last week!! I hope you will join us and share again!! If you are featured here, please feel free to grab a featured button to display proudly on your blog. 

Photobucket


Featured Button Code:


From Your Hostess:
This week Hazel had full day camp and I did not post much since we were not crafting much. We shared our book for Virtual Book Club for Kids, Quiet in the Garden by Aliki, our mermaid tail for dolls tutorial and pattern, and an easy doll spa wrap from a washcloth.


Now for This Week's Party 


A Few Simple Guidelines:
1)  Please follow Crafty Moms Share via GFC (or one of the other ways that work for you).  

2)  Link any kid-friendly, child-centered post. Please no etsy shops or giveaways, etc.  Remember to link to your actual post. 

3) Post the Sharing Saturday button on your sidebar or somewhere on your blog to help spread the word.
Photobucket


4) I would love it if you would follow me on FacebookGoogle+, and Pinterest 

5) If you do not have a blog, but want to share an idea you can leave it in the comments or e-mail it to me with a picture (if possible).

 
 Disclaimer: By sharing here, you are giving Crafty Moms Share permission to use your photos for features and to pin your craft at Pinterest.

Easy Spa Wrap for Dolls from a Washcloth


Today I picked up a pack of eight washcloths for $3.99 at KMart. I had seen spa wraps for 18-inch dolls all over the place and thought those are easy to make and relatively cheap with these washcloths. To make a wrap you need one or two washcloths depending on size of washcloth and doll. small piece of Velcro and two small pieces of ribbon. Since Hazel's dolls just missed being able to use one washcloth (except the BFC one) I used two and made a white stripe in both of the ones I made for the chubbier dolls. To do this, I cut a white washcloth in half and then sewed it with right sides together to the main washcloth.


Then I folded the white so it would add a few inches to the wrap and sewed the end of the white near the seam.


Next I checked the size on the doll and pinned where I wanted to sew the Velcro.

After sewing on the pieces of Velcro which I cut in half lengthwise so it would not be so wide on the doll clothes, I checked on the doll again for the placement of the straps (and the length). I pinned them and sewed them into place. Then the doll is ready for the spa!


The BFC doll's wrap was even easier since I did not have to add the white stripe. I just sewed the Velcro and straps on to it.

Now three of the four dolls are ready for a spa day or a beach day. I will make the fourth one as well. Maybe I should make myself one and just go to the spa.

For more doll ideas check out:

DIY Mermaid Tail for an 18-Inch Doll with Free Pattern


I have finally found time to give you the tutorial for the mermaid tail for the 18-inch dolls. I shared pictures of the first one awhile ago. I should mention that Hazel has of course lost the first one. Or at least misplaced it. I was hoping to tweak my pattern a bit but my tweaks without having the first one did not work well. 

Virtual Book Club for Kids: Quiet in the Garden by Aliki


It is time for the Virtual Book Club for Kids and this month's author is Aliki. Now Aliki has wonderful children's books. Some are about historical people, some about things like the five senses and others about experiences. We have read several and Hazel decided her favorite is Quiet in the Garden.

Sharing Saturday 14-32

Sharing Saturday Button

Thank you to everyone who shared with us last week and to all who took the time to check out the amazing posts people shared! We did not have a most clicked this week. For features I have art and lessons with nature, math and science lessons, and a mixture of crafts I loved.


Nature Lessons and Art

1) From A Little Pinch of Perfect: Sun Melted Crayon Art


2) From Moosewood Connections: Constructing a Solar Oven


3) From P Is for Preschool: Nature Prints with Clay


4) From Betsy's Photography: Freedom Ignites a Love of Learning


Math and Science Lessons

1) From Living Montessori Now: Shells and Starfish Activities + Free Printable


2) From The Gift of Curiosity: Practicing Advance Sorting Skills with Venn Diagrams


3) From Every Star Is Different: Little House in the Big Woods Pioneer Unit (I only am showing a math lesson from it, but the unit looks great!)


4) From Left Brain Craft Brain: Feed the Shark Play Dough Geometry


5) From Some of the Best Things in Life Are Free: Shark Week Fun for the Kiddos


Crafts and Favorites


1) From Annemarie's Haakblog: Bobble Stitch Wallet


2) From There's Just One Mommy: Doll Camp Fire Tutorial


3) From Living Montessori Now: Montessori Inspired Knitting Activities


4) From A Little Pinch of Perfect: Olaf Magic Paint Recipe for Kids

Thank you to everyone who shared last week!! I hope you will join us and share again!! If you are featured here, please feel free to grab a featured button to display proudly on your blog. 

Photobucket


Featured Button Code:


From Your Hostess:
This week we shared Cinderella tales for older children and adults, a no sew doll purse, doll sundae tutorial and a doll wooden table tutorial. (Can you tell we are on a doll kick?)


Now for This Week's Party 


A Few Simple Guidelines:
1)  Please follow Crafty Moms Share via GFC (or one of the other ways that work for you).  

2)  Link any kid-friendly, child-centered post. Please no etsy shops or giveaways, etc.  Remember to link to your actual post. 

3) Post the Sharing Saturday button on your sidebar or somewhere on your blog to help spread the word.
Photobucket


4) I would love it if you would follow me on FacebookGoogle+, and Pinterest 

5) If you do not have a blog, but want to share an idea you can leave it in the comments or e-mail it to me with a picture (if possible).

 
 Disclaimer: By sharing here, you are giving Crafty Moms Share permission to use your photos for features and to pin your craft at Pinterest.

DIY Wooden Doll Table


Continuing with some of our DIY projects for 18-inch dolls, I made Hazel a table for her doll. I had her pick out a plaque at JoAnn Fabrics and Crafts the other day. It was $2.99. For the legs I used clothespins and woman peg dolls. I glued one of each together and let the glue dry and then glued them on. Once the glue dried Hazel wanted to try it out. Here it is with a tea party and her Hazel doll.


Next I painted it white (well actually I reglued some legs since she insisted on taking it to Nonni's and it does not travel well). To make a stronger table you could use spindles instead of my cheap version. 


Then I wanted to share a cheap find. We found this magnetic chalk board that is doll size for $1 at Target, I believe. It came with a piece of chalk.

It is made to put in a locker, but that makes it the right size for dolls. Here it is on the table.


Now her dolls are really ready for their tea party and ice cream party! 

For more doll ideas check out:


Doll Ice Creams and Sundaes

Now in this hot weather I know we like to have ice cream and as a child I loved sundaes! Well with the heat and humidity we have been having, Hazel's dolls wanted to have a sundae party! I was inspired by the Miniature Sundaes over at Making Friends. I bought clear shot classes at the Dollar Tree and a package of small red pom poms for the cherries. Then I invaded Hazel's ice cream shop. Since Hazel does not like hot fudge or chocolate sauce on her ice cream (I know, strange), I made some without any chocolate sauce and some with it.


I glued a pink for strawberry and a brown for chocolate large pom pom to the bottom of a glass. Then I glued a white large pom pom on top of it for the whipped cream. Then I added the small red pom pom cherries. I showed them to Hazel and she asked for sprinkles, so I found her sprinkle beads and glued each one on. 

For the hot fudge sundaes I experimented with some brown paint. (I used acrylic since it was what I had.) I first tried just putting it on the top of the ice cream pom pom (I used beige for vanilla). However it just really sat there and also absorbed into the whipped cream pom pom. For the other two, I poured the paint onto the inside sides of the glasses before gluing the ice cream pom pom. This worked much better for looks. We have my favorite strawberry ice cream with hot fudge and a plain vanilla with hot fudge. Now Hazel's dolls are all set to party! They can use the spoons that came with their tea set to eat them! Stay tuned for doll milk shakes. 

For more doll ideas check out:


DIY No Sew Doll Purse


Sorry for being a bit sporadic this week. For the first time in our almost eight years of marriage I have gotten the house to myself for a couple of days. The main reason is for me to organize my extremely messy and useless craft room. Well, I got a good start on it!!

Today I wanted to share a simple way to make an 18-inch doll a purse. I was inspired by the tutorial over at Doll It Up: Make a Doll Purse Out of a Coin Pouch. I had bought a coin pouch at Rite Aid from the $1 bin, but I hadn't gotten around to making it like the one over at Doll It Up. Then when we were at Michaels the other day I saw this adorable panda head coin pouch on clearance for under $1 and knew it would make a perfect one. Hazel has been really into pandas lately.

To make it all I did was measure a piece of red ribbon so it would hang on the doll the way I wanted it to. I cut the ribbon a little long so I could fold the ends in and cover them. I glued the ends down and then glued the handle back over the end. I didn't want to try to sew the vinyl or whatever the coin pouch is made of. After the glue dried it was ready for Hazel (the doll) to use.
For more doll ideas check out:


Fairty Tales in Different Cultures: Cinderella for Older Children and Adults

We have spent so many Mondays talking about Cinderella tales. Just about every country and/or culture seems to have some version (at least one) of the tale. Did you know there are Cinderella tale books for older children as well as for adults. Here are some that I have found and I have read a few of them.