Google+
Showing posts with label Birthday Party. Show all posts

Frozen Themed Birthday Party with free printables and product review

Disclosure: I was sent these items to review free of charge from Oriental Trading. All opinions in this post are my own. I did not receive any other compensation for this review. As in all my reviews I am providing links for your ease, but receive no compensation.

This weekend we had Hazel's Frozen themed birthday party. Ever since Hazel saw the movie (her first movie at the theater), I have been collecting Frozen ideas on Pinterest. I got to use several of the ideas I pinned and products I pinned for this fun party. All of the girls had a great time and loved it. Today I am going to share the details with you including the products Oriental Trading sent me for the party to review. First I have to share Hazel's Elsa dress. Elsa is Hazel's favorite character in the movie and she really wanted an Elsa dress. With all the sheer fabric on them I knew her delicate skin would not be able to handle just any Elsa dress, so I made one for her. I used the Simplicity Pattern 1233, however I lined the bodice and cannot imagine using any of the sequined fabrics without lining.


DIY American Girl Doll Themed Birthday Party with Free Printables


For Hazel's sixth birthday, we decided to have a small family party and a friends party. So on her birthday we invited her grandparents (and aunts and cousin who live too far to come) and a few close friends like her godparents and their daughter. Since Steve always takes Hazel's birthday off and her grandparents are retired, we had the party on her actual birthday. We had all three of her living grandparents, her godparents' daughter (age 3) with her grandmother and one of my best friends with her two boys (ages 4 and 1) who Hazel loves. The invitations invited the guests to bring a doll with them. Only the two boys did. Hazel wore the crown I got at the American Girl Doll Store for my birthday and Ducky wore one of the ones that the dolls got. 


Fun Crafts and More Book Reviews

Disclosure: Candlewick Press gave me a copy of this book free of charge to review. All opinions in my review are my own and I did not receive any other compensation. As in all my reviews I am providing links for your ease, but receive no compensation.

Today I get to share with you some fun books from Candlewick Press. All three are intended to let a child be creative in fun ways. The first is a simple book that is intended for younger children. It is Maisy's Placemat Doodle Book by Lucy Cousins.


Quinceanera -- Exploring Hispanic Heritage

Congratulations to Sara S. for winning the WordWorld Kooky Spooky Halloween DVD!

Since Hazel loves birthday parties, I thought reading some books about a quinceañera would be right up her alley. A quinceañera is a fiesta for a Latina girl who turns fifteen. The fifteenth year is traditionally when girls turn into women in Latin American cultures. The traditional celebration differs from country to country. Most include a special dress for the quinceañera and a dance with her father (often a waltz) followed by a meal, dancing and a cake. Often there is a mass before the fiesta to honor the girl. In some countries the quinceañera has a court of friends ranging from 7-14 of each gender. (Source)

DIY Sesame Street Birthday Party

Have you entered my current giveaway?


My good friend's youngest son turned one last week. For his first birthday party she decided to do a Sesame Street themed party. She bought some decorations, but did much of it herself with some help from me and a few friends and her mom. She had the party at our church. She and her husband have large families, so there are a lot of people. She made some adorable tissue paper characters. They sat on the cake table. She got the idea here.

For decorations she had some Sesame Street tablecloths and bought a couple of decoration kits. Then she made favor bags. She had Cookie Monster, Elmo, Bert and Oscar. Sorry I didn't get any pictures of the Cookie Monster ones. She got the idea here.
Her mother and she made Elmo and Cookie Monster cupcakes. They were so cute!!

Then Hazel and I made a bowling game for the party. We were inspired by Sharing the Wealth: Sesame Street Birthday Party. They are very easy to make. We used empty plastic water bottles, construction paper and some printouts of the heads as well as Bert and Ernie's shirts. The heads are copyrighted, so I cannot share them, but I just googled the characters until I found what I wanted. I made them about 3.5 inches wide.

We wrapped the bottle in the paper and then glued on the heads. By the end of the party they were destroyed, but this is because several of the young boys were very hard on them and wanted to just kick and step on the bottles. We used the ball from one of Hazel's toy bowling sets.


She also bought a pin the nose on Elmo game. This would be pretty easy to make yourself. The one nice thing of the bought one is the noses were stickers.


She wanted two crafts for the kids whose ages really varied (one to preteen). The first was to decorate a hat with foam stickers.
Hazel wore her purple hat the entire time. She loved it! The second craft I found for her at Katherine Marie Photography. We decided to use paper cups instead of plastic for the ease of glue sticking.
These were the samples of Cookie Monster, Abby and Elmo that Hazel and I made. We only had pom poms and eyes. The two crafts got combined by the end and many of the older kids made character hats and used the foam on the cups. They had fun.

So that was the fun first birthday party we went to this weekend!! So many great DIY ideas!! We loved it!!

Olaf Mugs for Frozen Party


Hazel has decided her birthday party will be a Frozen theme this year. I saw in a few places making easy Olaf mugs and t-shirts. While pulling out some supplies for our mermaid play date, I found some white mugs I had bought for Hazel's Tea for 2 Birthday Party. We had left out paints for the older kids to decorate them. We only had one taker so I have six left over. Although painting and drawing are not my strong points, I thought I would give it a try. Olaf's face is rather easy. I pulled out my paint markers: black, white, brown, orange and blue.
I started with his mouth outline and then drew the spot for the teeth (which I later enlarged with the white marker). Then I drew the eyes and hairs and finally the carrot for a nose. 
Then on the back I wrote: "I like warm hugs."
The first one I did I thought the mouth was too big, but I actually liked that one better in the end. Our plan is to have a hot chocolate bar with the mugs and then have the kids take the mug home as the favor.
For more Frozen ideas check out:

Birthday Party at American Girl Doll Store

So earlier this month Hazel was invited to a friend's birthday party at the American Girl Doll Store Boston. Since the store is at least half an hour away, parents went as well. The party included lunch in the Bistro and having each girl's doll's hair done at the Hair Salon. Hazel of course loved it!! We also thought Nonni (my mother-in-law) would love it, so we made plans for the three of us to go and we figured with my birthday coming up, it would be a fun birthday party. Nonni wanted to splurge for the birthday party option in the Bistro. 

Lunch at the Bistro includes your choice of a starter and the main meal as well as a beverage. The non-birthday party price is $7.50 for a child and $16.00 for an adult. The child gets to bring a doll (or two and they do not have to be American Girl brand) and they have high chairs for the dolls. If a child does not have a doll, they have some to borrow. The dolls get a mug and saucer which the girls get to bring home. For the birthday party, the birthday person gets a special crown and all the dolls get a crown. Plus they bring out a cake and sing to the birthday person. Then they serve the cake with vanilla ice cream. The birthday person gets the leftover cake.  Each child gets a goody bag which differ for different ages, but the young girls includes a celebration tee shirt for the doll, a balloon for the doll and a book and stickers, plus a doll size American Girl shopping bag. The prices for the birthday party are $30 for a child and $20 for an adult. We drove one of the other friends (it was all girls from Hazel's class plus the birthday girl's older sister). The friend we drove did not have an 18-inch doll yet, so we had her borrow one of Hazel's. She picked Mimi. Hazel brought her Hazel doll. 

Now the hair prices range from $10 to $25, but most of the styles are $20 or $25. Having seen what they did and heard advice a few of the stylists gave about the dolls hair, I decided this was something I could do on Hazel's dolls. Her oldest 18-inch doll, Barbie, had a mess of hair. I considered having the hair salon deal with it, but after seeing several posts about how to fix doll hair, I decided to give it a go. I used the tips from All Things with a Purpose: Fix American Girl Doll's Hair Without a Trip to the Doll Hospital. However we had bought the American Girl doll hair brush after the birthday party and I found it did not work well. It broke very easily. However I had a cat brush that was made with metal and love that one. The cats hated it so I don't use it on them. I found soaking the dolls hair when it is really messy and then brushing it out works. I had to resoak Barbie's a couple of times to get right, but it worked. Then I was able to copy the styles they would do to Hazel's dolls. I convinced Hazel that we did not need to spend $25 on a doll's hair and we could instead buy baby clothes to make doll clothes.
I took a selfie for the first time!
Well when you book a birthday party, they send you invitations and thank you notes for the number you say. (They ask you for the largest number of people who will be attending when you book it.) Needless to say, we did not use these. When we were seated they gave both Hazel and me a sticker saying "It's my special day!" and gave me the crown, which Hazel of course wanted to wear. The napkin rings are hair elastics with a pink bow. I put Hazel's and Nonni's on Hazel's pigtails and put my hair up since I forgot to bring an elastic for my hair. Hazel also insisted on bringing all four of her 18-inch dolls. (None of them are American Girl dolls and I have explained to her that all four together cost less than one American Girl doll, so she has decided she would rather have more dolls than a brand one.) 

Hazel brought Hazel and Barbie and she dressed Hazel in the Dolly & Me dress that matched her own. They actually were perfect because the matched the crowns as well. Nonni got to bring Emily a BFC, Ink doll and I got Mimi. Now Hazel and Mimi are Madam Alexander dolls (one from KMart and one from Kohl's post Christmas sale), and I actually like their faces better than the American Girl dolls' plus I love that their chest and shoulders are plastic and not cloth like the American Girl dolls (and Barbie). Hazel of course wanted pictures of her with each pair of dolls. She also was excited that she got four mugs and saucers for the dolls.
We had a lovely lunch. Then it was time for cake. While waiting for the cake, Nonni took our picture, and look I get to wear my crown! I should note that Nonni hates having her picture taken, so she will not be pictured in this post. She does not let me take one usually.

The waitress came with a friend and the cake and sang to me.


Hazel and I blew out the candles and took a picture of the top of the cake. The cake is two layers--one white and one chocolate. They then took the cake and brought us each a slice and a dish of ice cream. The dishes look like small flower pots and each one has a fake daisy in it as well.

I also asked them to give pieces of the cake to the mother and daughter eating next to us since they were not celebrating a birthday and the tables were really close together. We still came home with half the cake. Since it was good cake, we didn't mind and Steve was happy to help eat it. I didn't take a picture of the sliced cake, but here is the fruit kabob starter that Hazel got (and most of the girls at the friend's birthday party). The yogurt was served in the same flowerpot dish with daisy as the ice cream.


We stuck the daisy in Hazel's pigtails and my pony tail. Hazel did not get the yogurt due to her dairy intolerance and instead got an extra fruit kabob. They also gave her raspberry sorbet instead of vanilla ice cream.

After lunch we took a picture of Hazel with her Hazel doll and then she wanted one of me and Mimi. She took this one.

Then we went to show Nonni the Hair Salon and all the dolls and accessories. Nonni of course had to buy Hazel something. After the struggle of getting her to chose one or two things, Nonni saw the price of the two things and decided it would be better to buy just one of the expensive things Hazel loved. She bought her Isabelle's Studio. I explained to both of them that this would be Hazel's Christmas and birthday gifts from Nonni. Hopefully Nonni will stick with it though she never does.
Hazel is loving it and has her Hazel doll sewing all the time now. In fact her (the doll's) sleeping bag is next to the studio so she doesn't have to go far. The only thing Hazel thought it was missing was a pencil to go with the sketch book. This brings us to our craft for today. I made Hazel a doll pencil from a bamboo skewer. I painted the tip black and left some wood color and then painted above it yellow for the pencil. Then I cut it off. After the paint dried I glued on a dot of pink foam and tried to make it look somewhat like an eraser.

Hazel took it for her Hazel doll as soon as she saw it. Before we left the American Doll Store however we got some pictures of the two Hazels with Isabelle.

We had to do it with and without the crowns.


Tomorrow I will share some more doll crafts and some Dollar Tree doll finds. 


For more doll ideas check out:

Minnie Mouse Party Foods and Activities -- The Details


Since the my post the other day became so long with sharing our decorations, I thought today I would share the details of what we served and what the kids played. Let's start with the cake since every birthday party needs a cake. Our cake was the strawberry cake we have made for most of Hazel's parties. The original recipe is found at Confections of a Foodie Bride. I have made changes over the past couple of years. At some point I will have to actually write down my changes and post about them. We made an eight-inch round cake and three small round cakes. I bought these pans at Joann Fabrics with a coupon for the ears.  We bought a container of chocolate frosting since black frosting is hard to come by and has so many chemicals for colors. 

Minnie Mouse Party & Decoration Product Review


 Disclosure: I was sent the decorations to review free of charge from Oriental Trading. All opinions in this post are my own. I did not receive any other compensation for this review. I added links to the particular products for your convenience, but not for any compensation.


So yesterday was the Minnie Mouse Half Birthday Party. Hazel had a blast. Now we spent a lot of time getting ready for this party and have posted many DIY ideas already. We also received five items from Oriental Trading that we used for the party. A few weeks ago we shared our Minnie Pinata and the black streamers we used to make it.

Minnie Mouse Birthday Party--DIY Decorations

For Hazel's half birthday party, I have some store bought Minnie Mouse decorations and some from Oriental Trading to review that Hazel picked out. However, I wanted to keep costs down and make some of our own. I have seen so many fun ideas online and have been pinning them to my Minnie Mouse Party Pinterest Board. I loved the idea of making Minnie head decorations from styrafoam balls. The first time I saw this was on The NY Melrose Family's Minnie Mouse Centerpieces. We did this. I glued them and Hazel painted them black. After the paint dried, I stuck a lollipop stick into each one.

Minnie Mouse Party Food

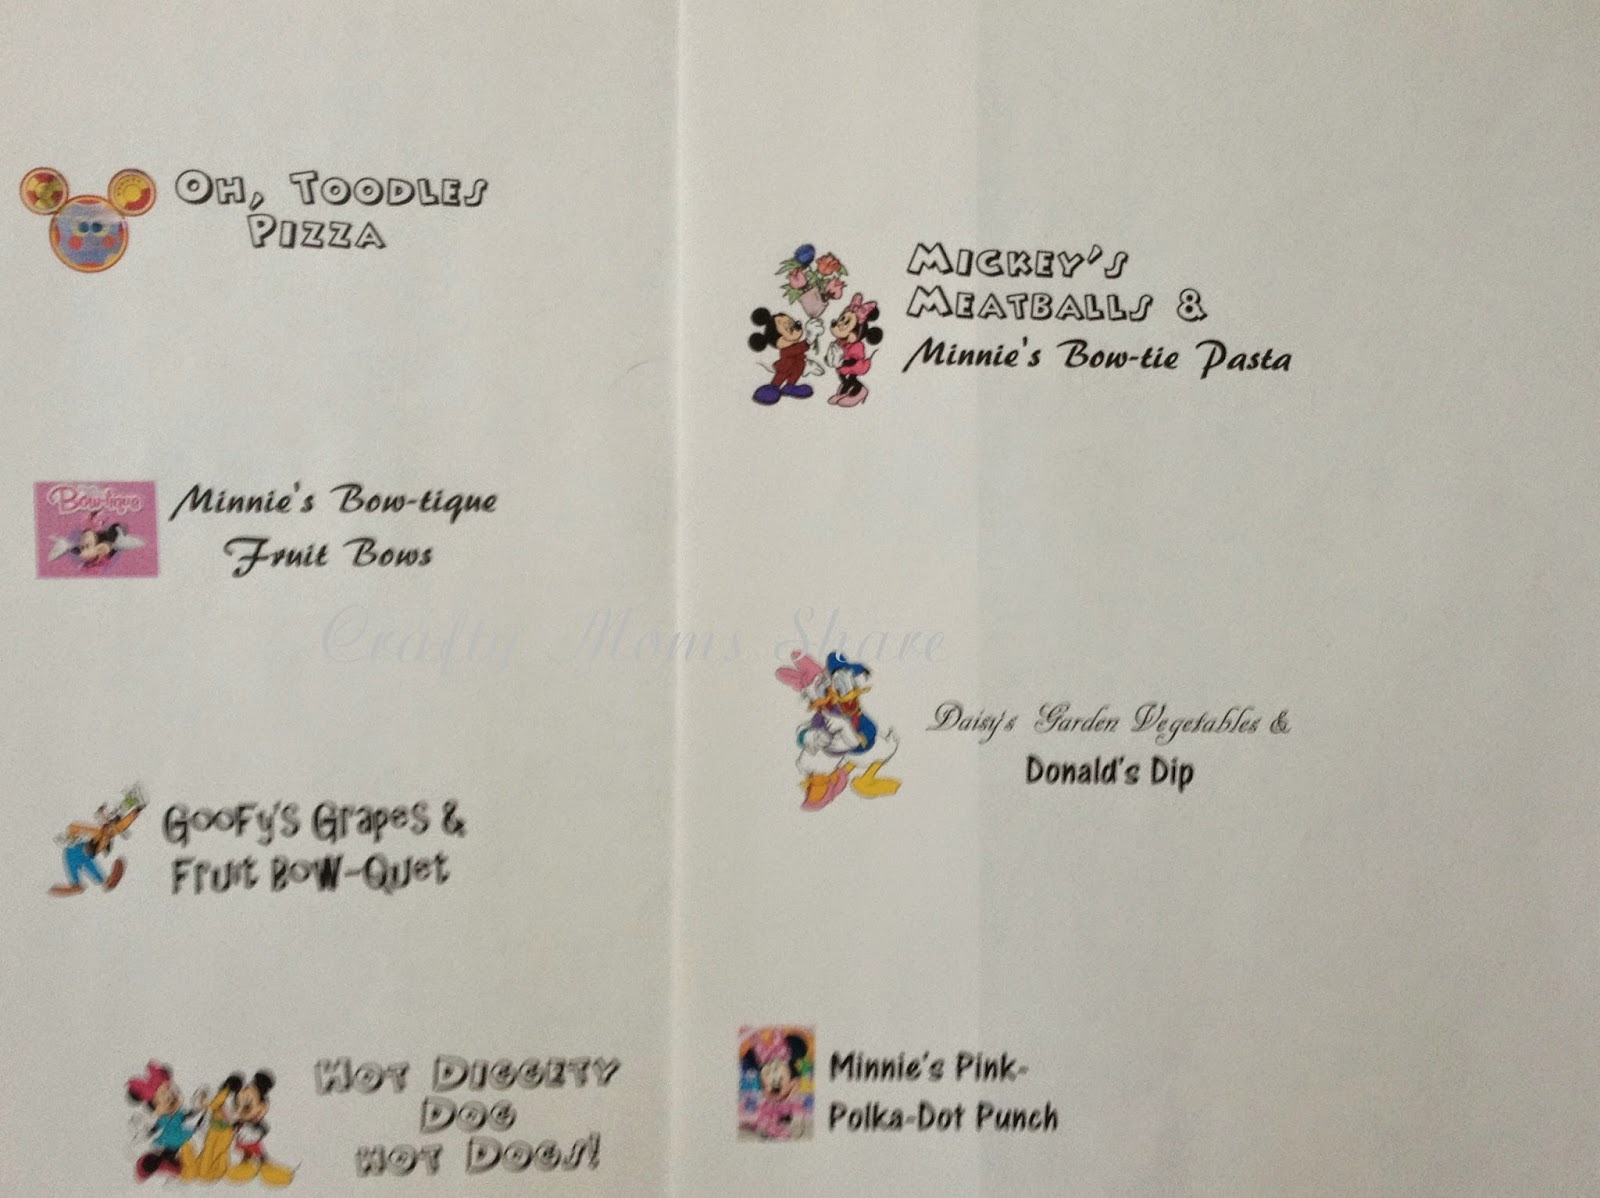
 So the party is this weekend and we finally figured out what to serve. Our menu includes:
  • Minnie's Bow-tique Pasta
  • Mickey's Meatballs
  • Hot Diggety Dog Hot Dogs
  • Oh, Toodles! Pizza
  • Daisy's Garden Vegetables and Donald's Dips
  • Goofy's Grapes and Fruit Bow-quet
  • Minnie's Bow-tique Fruit Bows
  • Minnie's Pink Polka-Dot Punch
  • And of course a Minnie Cake!

DIY Pin The Bow On Minnie Mouse Game


We have been working on final things for the Minnie Mouse party. It is this weekend! Today among other things, I made the Pin a Bow on Minnie Mouse game. Hazel really wants to play this one! To make it, I used a piece of black poster board, a white piece of paper and some polka-dot cardstock (I found it at Target). I used a large bowl and a small/medium bowl to make the head and a yellow-green colored pencil to show up on the black poster board. On the back of the poster board I traced the large circle bowl. Then I put the small bowl roughly where I wanted an ear and I had it overlap the large circle just a bit and traced it. Then I put it on the other side for the other ear. Once I got it how I liked it, I cut it out.

DIY Easy Minnie Mouse and Mickey Mouse Cake Plates & Free Food Label Printables

So when I bought all the Minnie Mouse stuff on clearance I did not get cake plates. I had pink cake plates we could use and Hazel was willing, however I kept seeing plates with ears on them as I researched for ideas. I realized how easy it would be to make them. I bought a pack of black cake plates at the Dollar Tree. Supplies to make the Mickey Mouse plates is just a pack of plates, black construction paper (two large sheets gave me enough ears for sixteen plates), a 3-inch circle punch and a glue stick.

I decided to use glue stick instead of craft glue so there would not be excess on the plates. To make Minnie Mouse plates you also need pink polka-dot paper (I found a pack of bright polka dot paper at Target--it was the only place I could find any) and scissors. I used the free jpg of bows at The Lovebugs Blog: Lovebug's Bow-tique Birthday Party.  Since I got them as a jpg, I was able to shrink the size for the plates. I am providing the new size of bows, but go check out her site for other great printables!! Here are the bows I used.


To make the plates, just punch two ears for each plate. I folded my large construction paper in half and did both sheets at a time so I got enough for two plates each time. Take two circles and put a little glue on one edge. Then glue to plate in appropriate places. Hold for a few seconds since it takes a bit of pressure to get the glue stick to stick. Let dry and do the next one. These will give you Mickey Mouse cake plates.


Mickey Mouse Cake Plate
(Sorry for the poor quality picture. My camera is acting funny!!) To make Minnie Mouse print out the bows using the template shared above on your bow paper and then put a small amount of glue stick on the back bottom edge of the bow and hold in place on the plate. You could also glue a ribbon bow on, but this would take longer and seeing how they are cake plates that will end up being messy and thrown away, I didn't think it was worth the expense or time.


I think they look cute and Hazel loves them! Since we are talking cake plates, I thought I would share our food labels with you as well. I will explain the food that goes with them in another post. I gave Hazel the choice of two types. I am providing you with both!  Just click picture for each type.


https://drive.google.com/file/d/0B8PVW7zBWFxscUd1UTc4T1JFejQ/edit?usp=sharing
Food Labels Using Characters and Clip Art Found On-Line


https://drive.google.com/file/d/0B8PVW7zBWFxsSHI4NUY0d3d3Yk0/edit?usp=sharing
Mickey & Minnie Mouse Food Labels
To make the Minnie Food Labels, I added bows again. I used the same template, but slightly larger. You can find them here.

So that is our newest installment of our Minnie Mouse Birthday Party series! For more posts check out: